Showing posts with label homebrew. Show all posts

Thursday, April 10, 2014

I Don't Believe In New Year's Resolutions

... but this year I'm making some brewing resolutions for the 2014 season. Jeremy and I are good brewers. We win medals in competition. We can generally turn out consistent beers from batch to batch. The number of hours I've devoted and the amount of educational material I've devoured keep mounting.

But we're still not great. We don't often take a category gold, and we've never won a best in show. Hop character is still hit or miss in our beers. The occasional batch is a clunker and I'll dump it or pawn it off on unsuspecting friends during one of our "family" dinners.

And so, I want to get better. So over the winter I've ruminated on and off about our process and what we can change for the positive. Here's the list:


  1. Make our starters earlier and bigger. I tend to do most of the yeast management and sometimes those poor little critters only get 24-36 hours of time to warm up and get ready to chew through some sugars. We also only have two 2000mL flasks and one stir plate so they end up splitting time on it. We're going to buy a couple of 4 liter flasks and a second stir plate to really handle the pitches we need for lagers and higher gravity beers.
  2. Make the same beers until we get them dialed. We've brewed our way through a good number of the recipes in Jamil's Brewing Classic Styles. This has been wonderfully informative on the ways different ingredients play in different styles. But the only beer we've ever scored in the 40's on was the ginger wheat recipe I've brewed over and over and over again through the years. Slowly tweaking the recipe every time has gotten it to the point that it's really balanced, drinkable and has a huge amount of flavor.
    So we're going to make beers we've made before, that we can drink ten gallons of over the course of the summer and not get sick of. And we're going to make them until we get it right.
  3. Take (even better) notes. I'm a big fan of brewing software. (We use Beer Alchemy. I'm partial to it because it's a well built Mac UI and it's dead simple to use despite having almost all the complexity you could want.) We already take detailed notes and monitor fermentation. But I'm talking about taking it to the next level and having a brewer's log detailed enough to track mash thickness, sparge rates, actual pH vs target pH, mash efficiency, evaporation, target vs actual attenuation, etc.
    There are a lot of little variables which don't lend themselves to tracking easily in the software but can (or at least I think they should) tell us something about the beers that turn out great vs. the ones that don't. (The fact that I'm spending a fair amount of time talking quality assurance with my buddy Gary who is damn close to opening up Panic Brewing just might have something to do with this.

So we'll see if it's made any difference by the end of the summer... It definitely can't hurt.

Sunday, April 6, 2014

Original Gravity vs. Plato / Brix

Oddly enough, the homebrew world and the professional brewing world use two totally different units to measure dissolved sugar content in our wort and our finished beer. Homebrewers use Specific Gravity and most pros use Plato. Why you may ask? I don't really know. Probably just 'cuz that's what I started with'.

Both give you a means to measure potential alcohol content and actual attenuation. Both are fairly straightforward to read and to use. So why should anyone care about the difference? Well, they mean different things and have different unit qualities.

Specific gravity (S.G.) is the ratio of the density of a sample liquid (wort) to the density of water. Because wort has dissolved sugars and a few other compounds in it, it's more dense than water. As our little microbial friends do their job and convert that sugar over to alcohol, which happens to be even less dense than water, the SG of the solution drops. There are some well-established formulas / calculators to help you with the exact math, but the scale provides a very simple approximation. Under most normal fermentation conditions, the part after the decimal point is pretty close to what your finished alcohol content will be.

So for a 1.050 SG beer, fermented to 1.012 FG (75% attenuation), you get 5% alcohol. (.05 = .05)

For a 1.080 SG beer, fermented to 1.019 FG (75% attenuation), you get 8.01% alcohol. (.08 ≈ .0801)

One usually measures SG with a hydrometer. It uses a specifically calibrated weight and a scale to measure the relative density of the liquid. Since the pre-fermentation solution has a higher density than plain water and alcohol has a lower density than water, it's straightforward to calculate the finished alcohol percentage. (Technically we lose some CO2 out of the airlock, but it's not enough to matter.)

Brix or Plato is the percentage of dissolved sucrose by weight in a solution. As I mentioned above, technically this is an approximation in wort because not all of the sugars all sucrose and not all of the dissolved solids are fermentable. Regardless, it's a pretty damn good estimate. (Brix and Plato are technically very slightly different scales, but for all practical purposes they can be used interchangeably.)

1 degree brix equals 1 gram of sugar dissolved in 100 grams of water. Also pretty simple, right? So for those same beers we talked about, a 1.050 OG is equivalent to 12.5 plato (or 12.5% dissolved sugar) and a 1.080 OG beer is equivalent to 19.3 plato (or 19.3% dissolved sugar.)

Typically you'd use a refractometer to measure Brix. It uses a known change in the refractive index to measured the percentage of dissolved sugar. However, alcohol's different refractive index makes it basically impossible to use a refractometer to measure finished gravity. It's just not the right tool for that job.

Thursday, June 6, 2013

Homebrew Hack : Monitoring Your Fermentation Gravity

At the last Square Kegs meeting, I was talking to some of the other club members about the hack we use to monitor fermentation progress without constantly pulling gravity samples out (or off of) our fermentors. Since it didn't seem like the majority of the club did this or had heard of it, it seems post-worthy.

I can take no credit for this idea. For the sake of argument, I'll just assume that Jeremy stumbled upon this on his own. (I'm sure that someone else out there did this first, but I like giving him the credit.)

Typically I'll take gravity readings throughout our brew day in order to make sure we're on target for our numbers and to determine if we need to adjust up or down towards the end of the boil. Typically I'll pull an O.G. (original gravity) reading during cooling. Then, once fermentation visibly starts, I'll use a wine thief to fill a sanitized sample jar and drop a hydrometer in it. We'll then leave the sample jar full of fermenting wort in our fermentation freezer and use it for gravity readings. Depending on the beer, it can be a little tough to read the hydrometer through the yeast and other trub that accumulates in the sample jar, but it's easy enough to get an approximate reading.

I also realize that technically the volume of wort in a fermentor is going to be a couple of degrees warmer in the middle of the fermentor and that there will be a difference in pressure between the two. However, I think that the reduced risk of infection and the ability to adjust fermentation temperature or dry hop at the appropriate time totally outweighs whatever differences those factors introduce.


Friday, March 15, 2013

My First Foray Into Judging

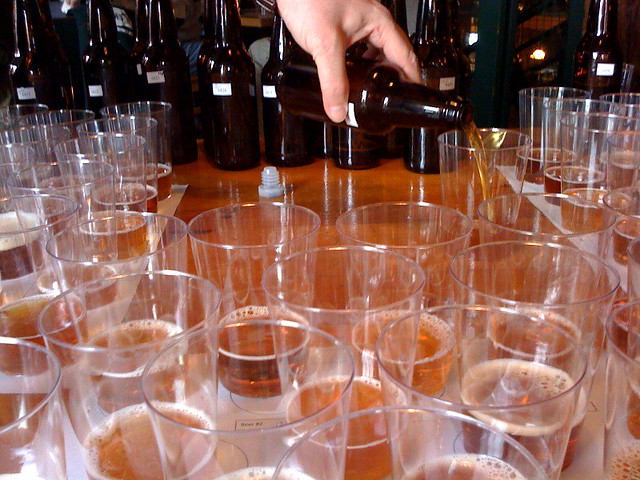
My homebrew club, Square Kegs, hosted our second annual Winterbrew competition back in the end of January. Jeremy and I had the awesome opportunity to work with the member of our club organizing the competition on a lot of the behind the scenes logistics and to actually judge a couple of flights as we're both taking a BJCP study course currently.


My experience with competitions up to this point had been simple: go online, fill out a form, send / drop off some beer, get a scoresheet back, read said scoresheet and go "hmm, ok. I guess that guy [loved my beer and has the best palate ever! || hated my beer because he doesn't know shit!] (Optionally pat myself on the back for a good score or good feedback.)

This year was really different. There is a ton of work that goes on behind the scenes and ahead of time to prepare. Beer needs to be cellared and cataloged for easy retrieval by the stewards. The flights need to be well organized by category for the judges. Little things like the type of plastic cup, mechanical pencils instead of wood and lighting all matter. From the outside it seems like it'd be a rocking good time : hundreds of beers to try and the judges just "have" to power their way through them in a few hours. Cue mental image of a bunch of beer geeks having a party. Not so. It's a serious, well-organized, highly focused endeavor.

Now The biggest insights I gained were into the actual process of judging. I had a preconceived notion which was largely blown away by reality. Firstly, it's highly subjective and hence really difficult. As a judge, you have about 15 minutes to taste each beer. You taste about 8-10 beers per flight. The beers vary in style, either just a bit for a large, popular category like IPA or immensely for wide-open categories like specialty or vegetable, herb and spice.

I think it's different for really experienced judges who have really calibrated their palates, but as a novice I was evaluating a beer against a written description of what it should be. No matter how elegantly written the BJCP styles are, it's still tough to translate written words into a sensory experience.

This might also change with experience, but I was pretty surprised by the varying sensitivity to different flavors, aromas and off-flavors. I am pretty sensitive to acetaldehyde, but apparently I can't detect diacetyl if it's smacking me in nose.

Finally, I was very surprised at how collaborative the judging process actually is. Often times if there's a wide spread in scores, the judges will discuss the beer and come to an agreement. The goal is to get scores within a somewhat narrow range, but one judge usually adjusts theirs up or down to get there. So the initial feedback about a beer might not really match up to the score it ended up with.

I came away with a whole new respect for the process and a few considerations for entering competitions:

  • If I enter a Belgian, it will not have overwhelming hot alcohol or phenolic (band-aid, hot-dog, nasty) notes. Belgian Styles ≠ I'll just let this ferment however hot it wants too and call it a Belgian!
  • If I enter a spice beer, I'll use a tincture or some other controlled means of adding the space after the beer is done fermenting. Or I'll split the batch and blend it back. Far too many of the beers I tasted had massive, overwhelming spice character.
  • I'll be really careful about categorization and specifying the base category on anything specialty. It's really hard to judge a beer if you have absolutely no idea what it is...


Monday, September 3, 2012

Water Basics

I had the opportunity to talk about the basics of water as it relates to brewing with the soon to be founder of Panic Brewing at the last Square Kegs meeting. Rather than re-writing the whole talk, I've posted the notes here. Gary took the liberty of adding some of the more technical details based on his education at the American Brewers Guild.

You can check it out here.

Monday, August 20, 2012

10,000 Hours?

Hey J - you look pretty bored. Oh and Diesel is characteristically
not giving a shit about anything. Except maybe that squirrel.
In his book Outliers, Malcolm Gladwell talks about the 10,000 hour rule. His poses the theory that to really reach mastery of any skill or craft you need to spend at least 10,000 hours honing it. He talks about the Beatles spending 10,000 hours over a few years playing in Hamburg Germany and about Bill Gates growing up spending his weeknights and summers in a computer lab starting at a young age.

I'm positive I haven't spent ten thousand hours brewing. Since I started tracking with BeerAlchemy in December of 2010, I have brewed 32 batches (195.75 gallons) either solo or with Jeremy. I started brewing in early 2004 and conservatively did about another 30-40 extract batches in that period of time. That probably works out to a bit under 1000 hours of brewing and cellar maintenance during fermentation. I've listened to most of the programming the brewing network has put out there, read a rather ridiculous volume of books and blogs, and certainly spent many many hours seeking out and trying new beers.

All in all, I really don't know how much time I've spent in the hobby and related activities. But what I do know (and the picture in this post sums it up well) is that it dawned on me this Sunday that there were certain points of the brewing process during which Jeremy and I didn't even need to talk this weekend. We just flowed from one task to the next, having dialed in our process on our equipment. I was laughing about our first all grain effort in which we screwed up royally on the mash temp, didn't quite hit our numbers, spent the whole time freaking out about whether we were screwing it all up and just barely made it through the whole process in 7 or 8 hours. Contrast that with a day which looked a lot like that picture. Mostly we just stay a couple of steps ahead and then sit around and way until it's time for the next burst of activity.

I don't purport to be an expert. We're just barely scratching the surface of making predictably good all grain beer and understanding how the inputs actually affect the finished product. But I think Malcolm's on to something. Maybe in another few years when I actually hit that 10,000 hour mark I'll start taking home some competition medals or even a best in show. Although at this point, I'm not really that worried. I'm having way too much fun along the way.

Friday, August 17, 2012

Rebrew: Citra IPA

As Jeremy and I have really started to dial in our all-grain process, we've gone back to a couple of beers we brewed last summer and brewed them again. I'm still on enough of a learning curve that we've been able to noticeably improve on those earlier attempts.

In particular, we re-brewed a Russian Imperial Stout early this spring which we'd done in the fall. The original beer was pretty solid, but lacked the velvety, chocolatey notes which really needed to shine for it to be great. We treated the water with a mix of Calcium Choloride (CaCl2) and Gypsum (CaSO4) this time around instead of a single CaSO4 adjustment in the fall. We also pitched onto yeast cakes from ten gallons of Ordinary Bitter brewed the week prior. Between those two small tweaks, we ended up with a far better end product. The aforementioned chocolate and coffee notes were there. Using a substantially larger pitch of yeast got us to a better finishing gravity, and using a slightly different carbonation level produced just the right level of carbonation.

So up next, we're re-brewing our Citra IPA from last summer. It was already a damn good beer, so we wanted to brew it again this year. However, given the opportunity to tweak a few things I wanted to tune up the malt profile a bit and accentuate the unique character Citra brings to the party. Based on the recent process improvements we've made to improve on our hop character, I'm pretty confident we'll get there by using a low temperature whirlpool addition. With the malt character, we're going to use an English Ale yeast (Wyeast 1335) which should accentuate the bread / biscuit character a bit more than a clean american ale yeast. We'll probably also tweak the water adjustments a bit and go with a mix of calcium chloride and gypsum instead of strictly gypsum.

The yeast starter is going and brewday is Sunday. I'll have some results in a couple of weeks!


Tuesday, June 26, 2012

Templeton Rye English Barleywine Group Brew

So, I've got some more Instagrammy beer porn for you here. Gary (aka Panic Brewing) from my homebrew club Square Kegs mentioned a few meetings back that he had a couple of Templeton Rye barrels just sitting in his basement. And being a good homebrewer / soon to be pro brewer, he decided that he'd organize a group brew of English Barleywine. Jeremy and I immediately jumped on the chance and brewed up ten gallons even though we had to struggle to figure out fermentation space.

More on the end product in six months or so. I am a little jealous Gary is the one sampling it to gauge how it's aging out...


Sunday, June 3, 2012

English Ordinary Bitter

Well looky look at that - I finally jumped on the Instagram bandwagon and can now take my own faux artsy photos without busting out the DSLR and Gimp. (Although it is pretty nice to just snap a quick shot on the phone and have something that looks reasonably good...)

On to the real subject of the post. Jeremy and I brewed 10 gallons of English Ordinary Bitter (using the recipe in Brewing Classic Styles.) Having previously mentioned my relatively newfound appreciation for truly sessionable beers, I am really happy with how this turned out.

It clocks in at 3.8% and packs a ton of flavor for such a small beer. There's a lot of toasted malt character and a hint of fruity esters from the Wyeast 1968 (London ESB) strain. The hop bitterness is restrained, but definitely present. Even with the relatively low CO2, it still has a nice creamy mouthfeel and a rocky, solid head.

Short of the Ginger Wheat I brew every summer, this is the smallest beer I've made yet and honestly probably one of the best. The recipe is dead simple (Marris Otter, Crystal 120, Special Roast and East Kent Goldings) but the flavors are all in balance and it just works.

We entered it the Two Brothers Hop Juice Competition and I can't wait to get a score sheet back on it...

Friday, March 23, 2012

Advanced Extract Brewing

So Jeremy and I had a couple of extract recipes we'd planned on brewing indoors, but the weather here in Chicago has been so unseasonably warm that we ended up being able to brew them outside this past weekend with our all-grain gear.

After doing exclusively all grain last summer and then dicking around in my kitchen with a couple of extract batches this winter, brewing an extract kit literally felt like cheating. (The extract recipe out of Brewing Classic Styles was only slightly less so.) It felt like last summer was really about dialing in our process and getting acclimated to the new equipment we inherited, bought or built along the way. With the exception of adding a whirlpool return to the immersion chiller, everything else that we use in brewing is familiar at this point.

Jeremy had a "Dead Ringer" kit from Northern Brewer which didn't get brewed last summer and we'd gone in on the ingredients to brew an extract version of Janet's Brown. (The hops and yeast from the original kit were tossed and replaced. Buying cascade and centennial by the pound makes it a far less painful decision to consciously throw away 6 ounces of hops after opening a bag and getting some of that barely present cheesy aroma.)

But back to the process - getting starters ripping 24 hours in advance and being able to use our gear outside made cranking these batches out wickedly efficient. From starting setup to having pitched the yeast and getting the carboys situated with blowoff tubes in the chest freezer was about four and a half hours. (And we probably lost about 30 minutes troubleshooting the propane burner putting out low heat.) The actual process of starting the water, crushing the specialty grains, steeping them, getting to boil, adding hops and extract per a schedule, and then chilling back down just flies by.

Not to mention the fact that the only variable which affects whether you hit your numbers in this process is if your evaporation rate in your software is correct or not. OG was dead on in both beers.

So after a largely painless brewday, I'm excited for the summer. We've got an ambitious plan for some awesome all grain batches. And I'm excited to taste the end product of these batches, bring it to club night, and enter it into competition in a couple of months. If these taste good to Jeremy, me, the club and fare well in competition, it'll be a great sign that we're starting to actually understand the inputs which matter to making great beer.


Friday, March 9, 2012

The Evolution of a Palate (Continued)

I was out last night with a few friends and ordered a bottle of Firestone Walker's Union Jack IPA. This is definitely one of my favorite beers and one that I'd say I know well. Unfortunately, this one tasted a bit off. The hop aromatics had largely dropped out, leaving a sharp bitterness and some yeast / malt character behind without the balancing notes which make the beer so good.

I don't fault Firestone for this one - I'm guessing that the offender was the bar which served the beer and that they sat on their inventory for a while prior to serving it and may not have stored it properly. (We had multiple bottles and they all exhibited the same characteristics.)

But the fact that I noticed this and neither the fiance nor the other person drinking the beer did is just the latest example of a somewhat disturbing trend that both Jeremy and I have noticed lately. After making the jump up to all grain, getting really critical of our own beers and starting to really notice the contributions of different ingredients in finished beers, I'm starting to pick out off-flavors and imperfections in commercial beers in a way which I haven't previously.

And I'm not saying this as a "beer snob" or to say that I have some freakishly evolved palette which is capable of picking out every flavor in every beer. I'm saying this as someone who loves to drink beer who is now finding it more difficult to genuinely enjoy a really wide spectrum of commercial beers despite their imperfections which I just never noticed before. This isn't necessarily a good thing. (Outside of the Cicerone or BJCP courses of study, which I have been thinking about pursuing. But I know that I can easily get caught up in being esoteric and I don't want to indulge that here...)

Anybody else out there notice this?

Tuesday, February 21, 2012

Happy Barrel Day!

Yep. Jeremy and I got our hands on one of these bad boys. We'll be making a Russian Imperial Stout quite a bit earlier than originally planned this year. I am really, really excited.

Oh and coincidentally, a pound each of Simcoe and Citra showed up at the same time today.

Seriously happy day today.

Sunday, February 19, 2012

Mexican Hot Chocolate Stout (Scoresheet review)

As per my previous post, I'm going to taste each beer Jeremy and entered in competition this winter against the score sheets we got back. Hopefully paying attention to the feedback from the bjcp judges and making some tweaks will help us to get better.

Since the Mexican Hot Chocolate Stout is still on my main tap handle downstairs I decided to lead off with it.

The score sheet I got back on this one is online here.

My notes:

Aroma
Judges' Notes: Malty, slightly spicy, lightly roasted malt in the background, lack of carbonation hurts

My Notes: Bready, sweet, slightly peppery / yeasty, some very slight green apple


Appearance
Judges' Notes: No carbonation, clear, mahogany
My Notes: Jet black / opaque with tan, lingering head

Flavor
Judges' Notes: Munich breadiness, minimal hop flavor, no hot chocolate flavor, phenolic, minimal spiciness from peppers 
My Notes: Sweet, green apple flavor persists, finishes with some roast bitterness and lingering sweetness (presumably from the lactose in the mexican hot chocolate used)

Mouthfeel 
Judges' Notes: No carbonation, light body, minimal astringency
My Notes: Light, moderate carbonation, slightly "slick" (I'm guessing from the lactose or milkfat)

Overall
Judges' Notes: Lack of carbonation really hurt the beer, malt bill was not quite stout-like, more pepper would have been desirable.
My Notes: I missed the mark on this one. The underlying recipe was good, but I think next time around I'll use more of the hot chocolate spices (chile, cinnamon, cacao nib) and skip the actual hot chocolate. I also get a distinct, but not overpowering acetaldehyde flavor from this one. It'll get more time in the fermentor with a temperature bump next time around.

Score: 21

One of the things which stood out in all of the results from this competition was that our carbonation was off. The Blichmann beer gun is an awesome device, but I don't think we quite have the process dialed in with it. I'm going to experiment with it on the next couple of batches we do in order to get an appropriate level of carbonation. It's good in the keg, but it seems like some is getting lost in the bottling process.

The other changes I'll make on this one are upping the chocolate and roasted malts and using a spice blend instead of actual Mexican Hot Chocolate.

Friday, February 17, 2012

Equipment Notes : Fermentation Heater / Brew Belt

Chicago winters are cold. This one hasn't been as bad as they usually are, but it's still cold. And since I chose to live in an old two flat built in the 1920's (before the advent of modern insulation) that means my basement is cold. I keep the thermostat down there set to 65, but based on the little temperature recording thermometer I keep with the "cellar" beer, the air temp at ground level can get as low as 45F.

So all of this produces great conditions for making lagers (duly noted for next year's brew calendar), but Jeremy and I decided to brew a saison so it'd be ready right as the first signs of spring are appearing. And saison yeast likes it hot. I'd initially thought fermenting at 67 - 68 for the first 48 hours and then turning the fridge controller all the way up to 80 would result in a decent free rise and get the 80-85% attenuation appropriate for a saison.

OG: 1.072
Target FG: 1.010
Original Volume: 5.5 US Gallons

Reality: at 72 hours from pitching, the beer was around 1.036 and 61 degrees F. Damn lazy yeast!

Since brew belts are only about $20 from Brew Camp (my awesome local homebrew store), it seemed like a reasonable piece of equipment to experiment with. Particularly since Saison yeast are tolerant of high fermentation temperatures and I only have a controller suitable for cooling which means the brew belt is just going to be on without a controller.

So this past Wednesday night I bought one and wrapped it around my better bottle per the instructions.

In about twelve hours, it raised the temperature up to 70F and by this morning (36 hours later) it was up to 81F. These bad boys actually work really well. If I were to use it on anything besides a Belgain yeast strain that can handle the heat, it'd be necessary to get a digital controller to prevent it from overheating the beer.

I'll post some stats on the finish beer as well as some tasting notes when it's ready.

Wednesday, February 15, 2012

First Competition Results

After eagerly checking my physical mailbox like a little kid waiting for something fun for the past two weeks, the score sheets from the first competition Jeremy and I entered our beer into showed up in my gmail inbox Monday night.

Original on Flickr here
I was bummed that we didn't place in any of the categories we entered, but after reading through the sheets I was pretty pleased with the feedback we received. We definitely need to dial in the carbonation process when using the BeerGun and to pay even more attention to getting proper attenuation on our beers.

The Beer Judge Certification Program (www.bjcp.org) uses the following scoring guidelines:
Outstanding : 45 - 50
Excellent : 38 - 44
Very Good : 30 - 37
Good : 21 - 29
Fair : 14 - 20
Flawed : 0 - 13

Here are the scores we ended up with:

Octoberfest (03B) : 27
Russian Imperial Stout #1 (13F) : 24
Russian Imperial Stout #2 (13F) : 26
Citra IPA (14B) : 37 (Booyah!)
Extract Double IPA : 25
Extract Mexican Hot Chocolate Stout : 21

All in all, I think we did reasonably well for a first competition. We're going to sit down with each beer and the score sheet to review the feedback with the actual beers over the next couple of weeks. (More posts to follow...)

Monday, January 16, 2012

First Competition

Square Kegs (my local homebrew club) is running a startup competition later this month. I've never entered beer in one before, but was definitely inspired to do so by listening to Jamil Zainisheff talk about getting better by doing so on many episodes of brew strong. I also happen to think that some of the recent batches I've done with Jeremy are the best I've ever made, and absolutely would stand up against other homebrew.

So yesterday I stopped by BrewCamp to drop off six entries in total:

  1. West Texas Crude (Russian Imperial Stout, collaboration)
  2. Light Sweet Crude (Russian Imperial Stout, collaboration)
  3. Citra IPA (American IPA, collaboration)
  4. Beer Wench Lager (Oktoberfest, collaboration)
  5. Yet Another Imperial IPA (Imperial IPA, collaboration, extract experiment)
  6. Mexican Hot Chocolate Stout (Spice Beer, solo venture, extract experiment)
I'm pretty stoked to get some BJCP-certified feedback on all of the beers and potentially win a couple of categories!

Props to the competition's organizers - they had over 500 entries yesterday. I'm looking forward to the actual event.

I'll post the score sheets once I get them back.


Wednesday, January 11, 2012

Growlers Doing Double Duty

Both of those growlers were full of beer on New Year's Eve. Having been emptied, they were put to work containing blow off for the two batches brewed on the next two days... Local love to Half Acre.


Saturday, January 7, 2012

Better Bottle Hack

After listening to many, many episodes of Can You Brew It on the brewing network, the standard volumes they use are a part of my process.

For a 60 minute boil:

  • Mash and sparge to 7.2 gallons
  • Boil down to 6 gallons
  • Transfer 5.5 to the fermentor
  • Finish with 5 gallons of clear, drinkable beer


Since none of my boil kettles have a sight glass on them, I decided to do something I'd been thinking about for a while. I measured out a half gallon of water, put the better bottle on a flat, level surface and started marking. After the first half gallon, I did full gallons up to 5.5. (It's actually a bit higher up in the Better Bottle than I thought it would've been. Regardless, after the massive blow-out I had earlier this year in a Russian Imperial Stout, I've started adding fermcap to my fermentation now as well.)

Here's the end result. It made it a whole lot easier to top a partial boil extract batch up to the correct volume at the end of the process and should make it a hell of a lot easier to transfer out exactly five gallons of finished beer.

I could've gone with the fancy vinyl stickers I've seen elsewhere, but a sharpie seems to have worked just fine this time around.

Friday, January 6, 2012

Extract Process (Revisited) Part II

So what better way to ring in the new year than by brewing a couple batches of beer?

As I mentioned in a prior post, I had been planning on doing a couple of extract batches this winter to try to stay out of the bitter Chicago cold but keep up on brewing.

I wrote up my process here ahead of time, which ended up working relatively well. Unfortunately, it's been quite a while since I brewed inside and I ran in to a couple of trouble spots on the first batch. (Imperial IPA from Brewing Classic Styles)

Firstly, I did a full 6.5 gallon boil instead of the 3 gallon boils I used to do on the stove. I remember reading somewhere that natural gas has significantly less heat energy than propane, but didn't really take that to heart. It took almost two hours to get it up to boiling, with two burners on my stove at full blast. That sucked.

Secondly, the cooling stick I bought ended up barely having any effect on the temperature of the wort at all... I probably should have thought out the physics on that one. 1 gallon of frozen water really doesn't have much of an impact on 6 gallons of boiling hot, sugar laden wort. It got the wort down to about 165 in 30 minutes. Not so good either.

All in all, six hours start to finish on an extract batch is pretty weak in my opinion.

So, I adjusted for those issues on the second batch of the long weekend. (Mexican Hot Chocolate Stout - recipe to follow.)

I did a 3 gallon boil, which made an enormous difference in the time to get the water up to temp. After finishing my boil, I used an old trick Alton Brown recommended on his episode of Good Eats about brewing. Dump a 7lb bag of ice plus a gallon of near-freezing distilled water into your wort as soon as you kill the heat. That alone dropped the three gallons of wort to 115F in about 3 minutes.

Three hours start to finish on the second batch. That's more like what I expect from extract brewing!

Friday, December 30, 2011

Reusing Star San

I switched to Star-San earlier this year and have been pretty happy with the product overall. However, having just recently bottled up ten gallons of Russian Imperial Stout, and looking at bottling a five gallon batch of lambic and a few assorted other brews, I stand to keep using the stuff at a pretty quick rate. I'm on my second large bottle this year and it definitely adds up. 

I'd read in a few places that one can re-use it as long as the pH stays below 4 (although 3 seems better if you can store that strong of an acid) and it's clear.

So here's my plan to start doing so:
  • Buy some pH test strips which read down into the 2.x range
  • Mix it with distilled water instead of tap water
  • Store it in an unused, PBW'd corny keg or a heavy duty plastic bucket with a lid
  • Test the pH before each use and either add more concentrated Star San if it's still clear or dump and start over if the liquid is cloudy
Anyone else out there had experience with this? I'll follow up on how it works for me.