Tuesday, May 27, 2014

My BJCP Exam Results

... are in and I'm officially a certified BJCP judge! A year of studying the style guidelines, tasting many many hundreds of classic examples, and writing an ungodly number of practice scoresheets paid off. I scored in the eighties, which is good enough to take me up to a national judge but not quite what I'd need to hit the master level. I'm thrilled to have scored that well.

I owe a great debt of thanks to one James Lewis who organized and taught the class, as well as my classmates from CHAOS and Square Kegs for keeping it fun. (Sampling 5-10 beers every three weeks under the critical lens of the style guidelines gets a little harder than one might expect...)

Onward to the summer competition circuit and to the two competitions Square Kegs will be putting on this year: Überbrew and Winterbrew!

Saturday, April 12, 2014

Being A Coffee Nerd Taught Me Something About Brewing

Usually it's the other way around. The silly amount of random brewing knowledge I've built up tends to inform a lot of the food science and chemistry stuff I think about.

But this week I was making the first starters of the season for a Scottish 80/- which Square Kegs (my homebrew club) is brewing this weekend for an awesome event called Beerfly Alleyfight put on by Haymarket Brewery. It's part of Chicago's Craft Beer Week and is a simply phenomenal event. But I digress.

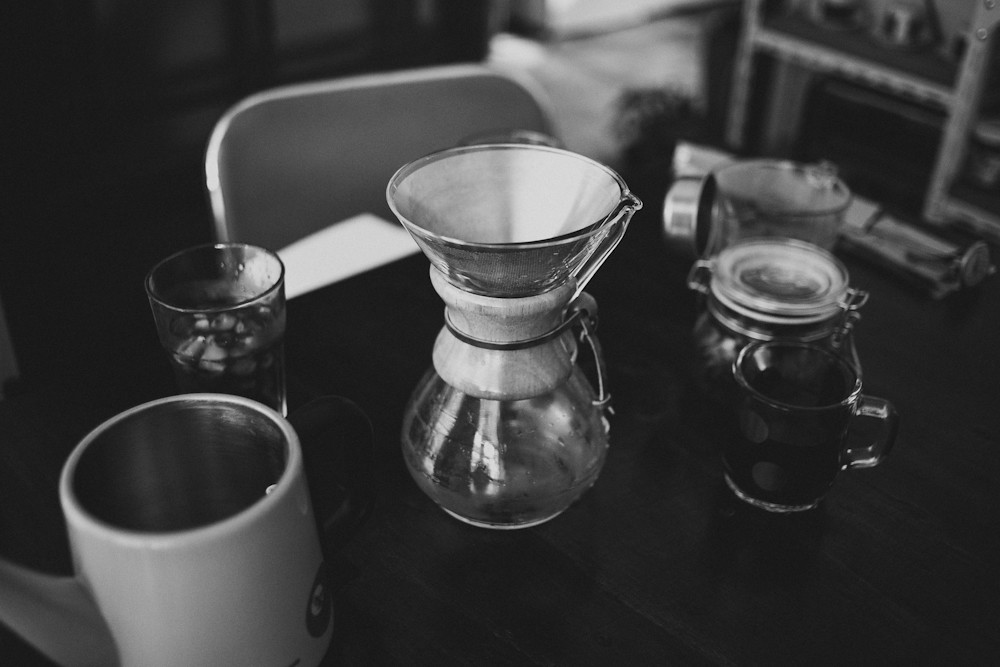
We've been making pour-over coffee at my office in a Chemex for a while now. (If you haven't been bit by the coffee bug, you might not want to read on. It's the preferred brewing method of hipsters and snooty coffee snobs.) The standard Chemex rig consists of a burr grinder, the chemex and a scale on which to both weigh out your beans and then for weighing out the hot water.

The important part here is that the Chemex looks a lot like an Erlenmeyer flask and it sits on a gram scale throughout the whole brew process.

For some reason it never occurred to me to use the same scale I use to measure my DME for starters to measure the water. I'd just measure up to what looked like about the right volume based on the markings on the flask. But now that I'm in the habit of using the Chemex, I used the scale for measuring the water. I feel like a moron for never having done that before. (It's dead simple to convert between the two. 1mL = 1 gram of water.)

It just goes to show that you can always draw inspiration from other places in your life.

Thursday, April 10, 2014

I Don't Believe In New Year's Resolutions

... but this year I'm making some brewing resolutions for the 2014 season. Jeremy and I are good brewers. We win medals in competition. We can generally turn out consistent beers from batch to batch. The number of hours I've devoted and the amount of educational material I've devoured keep mounting.

But we're still not great. We don't often take a category gold, and we've never won a best in show. Hop character is still hit or miss in our beers. The occasional batch is a clunker and I'll dump it or pawn it off on unsuspecting friends during one of our "family" dinners.

And so, I want to get better. So over the winter I've ruminated on and off about our process and what we can change for the positive. Here's the list:


  1. Make our starters earlier and bigger. I tend to do most of the yeast management and sometimes those poor little critters only get 24-36 hours of time to warm up and get ready to chew through some sugars. We also only have two 2000mL flasks and one stir plate so they end up splitting time on it. We're going to buy a couple of 4 liter flasks and a second stir plate to really handle the pitches we need for lagers and higher gravity beers.
  2. Make the same beers until we get them dialed. We've brewed our way through a good number of the recipes in Jamil's Brewing Classic Styles. This has been wonderfully informative on the ways different ingredients play in different styles. But the only beer we've ever scored in the 40's on was the ginger wheat recipe I've brewed over and over and over again through the years. Slowly tweaking the recipe every time has gotten it to the point that it's really balanced, drinkable and has a huge amount of flavor.
    So we're going to make beers we've made before, that we can drink ten gallons of over the course of the summer and not get sick of. And we're going to make them until we get it right.
  3. Take (even better) notes. I'm a big fan of brewing software. (We use Beer Alchemy. I'm partial to it because it's a well built Mac UI and it's dead simple to use despite having almost all the complexity you could want.) We already take detailed notes and monitor fermentation. But I'm talking about taking it to the next level and having a brewer's log detailed enough to track mash thickness, sparge rates, actual pH vs target pH, mash efficiency, evaporation, target vs actual attenuation, etc.
    There are a lot of little variables which don't lend themselves to tracking easily in the software but can (or at least I think they should) tell us something about the beers that turn out great vs. the ones that don't. (The fact that I'm spending a fair amount of time talking quality assurance with my buddy Gary who is damn close to opening up Panic Brewing just might have something to do with this.

So we'll see if it's made any difference by the end of the summer... It definitely can't hurt.

Sunday, April 6, 2014

Original Gravity vs. Plato / Brix

Oddly enough, the homebrew world and the professional brewing world use two totally different units to measure dissolved sugar content in our wort and our finished beer. Homebrewers use Specific Gravity and most pros use Plato. Why you may ask? I don't really know. Probably just 'cuz that's what I started with'.

Both give you a means to measure potential alcohol content and actual attenuation. Both are fairly straightforward to read and to use. So why should anyone care about the difference? Well, they mean different things and have different unit qualities.

Specific gravity (S.G.) is the ratio of the density of a sample liquid (wort) to the density of water. Because wort has dissolved sugars and a few other compounds in it, it's more dense than water. As our little microbial friends do their job and convert that sugar over to alcohol, which happens to be even less dense than water, the SG of the solution drops. There are some well-established formulas / calculators to help you with the exact math, but the scale provides a very simple approximation. Under most normal fermentation conditions, the part after the decimal point is pretty close to what your finished alcohol content will be.

So for a 1.050 SG beer, fermented to 1.012 FG (75% attenuation), you get 5% alcohol. (.05 = .05)

For a 1.080 SG beer, fermented to 1.019 FG (75% attenuation), you get 8.01% alcohol. (.08 ≈ .0801)

One usually measures SG with a hydrometer. It uses a specifically calibrated weight and a scale to measure the relative density of the liquid. Since the pre-fermentation solution has a higher density than plain water and alcohol has a lower density than water, it's straightforward to calculate the finished alcohol percentage. (Technically we lose some CO2 out of the airlock, but it's not enough to matter.)

Brix or Plato is the percentage of dissolved sucrose by weight in a solution. As I mentioned above, technically this is an approximation in wort because not all of the sugars all sucrose and not all of the dissolved solids are fermentable. Regardless, it's a pretty damn good estimate. (Brix and Plato are technically very slightly different scales, but for all practical purposes they can be used interchangeably.)

1 degree brix equals 1 gram of sugar dissolved in 100 grams of water. Also pretty simple, right? So for those same beers we talked about, a 1.050 OG is equivalent to 12.5 plato (or 12.5% dissolved sugar) and a 1.080 OG beer is equivalent to 19.3 plato (or 19.3% dissolved sugar.)

Typically you'd use a refractometer to measure Brix. It uses a known change in the refractive index to measured the percentage of dissolved sugar. However, alcohol's different refractive index makes it basically impossible to use a refractometer to measure finished gravity. It's just not the right tool for that job.

Saturday, February 22, 2014

A Brief Summary of Hop Chemistry

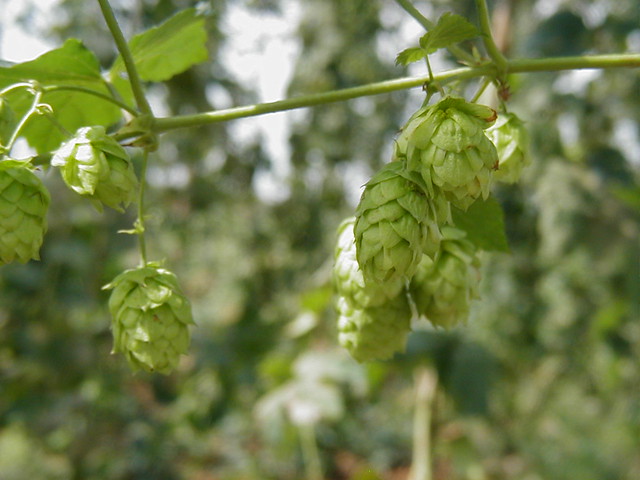
It seems that the whole craft beer community is obsessed with hops. Consumers go batshit crazy over beers hopped and dry-hopped with the latest and greatest proprietary poster children of breeding programs. (Three Floyds Zombie Dust blew the doors of for Citra, and as of late Mosaic is the darling of the brewing world.) Hop Contracts are the de facto norm for any and all "in-demand" hops and for most anything that's commonly used in the states. Good luck getting your hands on Amarillo, Citra, Mosaic or Simcoe in quantities of a pound or more.


Most everyone reading this blog knows that hops impart bitterness, aroma and flavor into beer. But the commonly accepted knowledge amongst homebrewers about how this actually works can be summed up in a couple of sentences: Adding hops with high alpha acid content at the beginning of the boil contributes to bitterness. Adding hops toward the end of the boil and through dry hopping enhances aroma and flavor. 

Thankfully, the greater brewing community (largely commercial brewers and academics the like of Dr. Charlie Bamforth, with a substantial contribution from Stan Heironymus and the Brewers Association) is starting to peel the layers back on the actual chemistry at work here and share that knowledge.

Let's talk about bitterness first: Alpha acids are indeed the compounds which contribute to bitterness in finished beer, but they don't do it directly. During the boil (in the presence of heat and kinetic energies) they change their structure slightly through a process called isomerization, which simply means that the atoms in the molecule re-arrange themselves and exhibit different chemical properties.

Adhumulone, cohumulone, and humulone are the three distinct compounds which comprise the majority of the alpha acid content in a hop.

Adhumulone generally represents a minority of the alpha acid content and its contribution to bitterness is not deeply understood.

Cohumulone and humulone make up the majority of alpha content. Noble hops tend to have a higher ratio of humulone to cohumulone and as such cohumulone was considered less desirable and to impart a "harsher" bitterness. As such, it's common to see a humulone / cohumulone ratio or percentage cohumulone content published in hop data. However, newer high-alpha hops have been developed which have higher cohumulone content without any "harshness".

Interestingly, the isomerized alpha acids contribute to both foam stability and provide anti-bacterial properties on top of contributing bitterness to the finished beer.

On to aroma and flavor: Hops also contain a small percentage (by weight) of essential oils which are almost entirely responsible for their flavor and aroma contributions. There are numerous oil fractions present in hops, but four in particular make up the majority : caryophyllene, farnesene, humulene and myrcene. Each of the oil fractions has different aroma and flavor profiles and volatilize at different temperatures, although they'll all volatilize off during an extended boil. As such, late kettle, flame-out / whirlpool and dry-hopping all emphasize the aroma and flavor contribution by allowing these essential oils to stick around. 

Caryophyllene adds a spicy, herbal and/ or woody character similar to humulene when boiled. Its effect on flavor when fresh is not well understood. Interestingly, it is one of the chemical compounds identified as contributing to the spicy character of black pepper and is also found in substantial quantities in Basil, Canabis, Cloves, and Oregano. Caryophyllene oxidizes quickly and as such its aroma / flavor contributions will drop off quickly in finished beer.

Farnese is is typically only found in significant quantities in noble hops. Its fragrance has green, woody, vegetative notes with hints of lavender. Flavor-wise, it adds the essence of herbs and organic wood-like offsets. Oxidation degrades its essence rapidly, and storing in air tight refrigerated packaging increases its storability.

Humulene  is thought to lend the distinctive "noble" character to noble hops; most varieties traditionally considered noble are high in humulene, while many bittering hop varieties have very low levels. It contributes woody, earthy, and herbal aromas and flavors. The noble character is strongest when the hops are used in dry hopping or late hop additions; if boiled for longer periods, humulene lends the finished beer an herbal or spicy character. Oxidation degrades its essence rapidly, and storing in air tight refrigerated packaging increases its storability. Humulene does have a higher boiling point relative to the other oil fractions and will contribute more aroma and flavor if used earlier in the boil.

Myrcene contributes a green, herbaceous, citrusy, resinous aroma often associated with "American" or "fresh" hop character. It is highly volatile and loses much of its aroma when boiled. It is also found in Cannabis, Lemongrass, Mangoes, Thyme, and Verbena. Myrcene is highly volatile / unstable and as such will provide maximum flavor contribution when used as a late / dry hop and in beer consumed when fresh.

There's a lot of chemistry at work here. (Frankly, far more than I grok at this point.) But it's safe to say that there's a lot more to adding bitterness and flavor to our beer than just grabbing a couple packages of pellets at the homebrew shop and adding them at the beginning and end of the boil. 

If I had to guess, one could dive in to the oil profiles of individual hops and start to determine what flavors and aromas they'd contribute when used at different points in the process. (More to come soon on that...)

Tuesday, November 5, 2013

Fresh Trumps Damn Near Everything

A couple of guys from the club and I have been studying for the Beer Judging Certification Progarm (BJCP) exam since last January. In the course of doing so, we've tasted a lot of beers. They've been all over the map in terms of style, age and quality. Most of what we've tried has been out of my wheelhouse in terms of what I'd typically drink and some of what we've sampled has legitimately blown my mind.

The examples of Eisbock and Weizenbock we tried were nothing like what I anticipated. Eisbock is a somewhat eccentric style in which a doppelbock (think a malty, rich, but very drinkable beer) is freeze concentrated up to anywhere between 7 and 30% abv. I expected it to be hot, sharp and far more alcohol focused than the example we tried. It wasn't. It was just richer, maltier, and perfectly balanced. The brewer somehow managed to keep the beer in balance and the net result was just a bigger, more flavorful version of the base style.

On the other hand, we've tried a fair amount of shitty, stale beer. It's tough to get many of the classic examples (at least in the BJCP guidelines) here in the states. A long, bouncy trip across the ocean in a container without any sort of temperature control (presumably), followed by an indeterminate amount of time on a warm shelf in a liquor store just doesn't bode well for freshness.

What starts out as an amazing example of an English Bitter (a low-gravity, balanced session beer) or a fantastic German Pilsner (clean, grainy and assertively hoppy) can both fade into boring, lifeless, cheesy, almost grapey beer. And that's a damn shame. Not only because they're merely a shadow of what they were leaving the brewery, but because they also make it difficult to appreciate just how amazing those beers can be.

Contrast that with taking a trip to your local brewery and trying that same German Pils (Half Acre Pony Pils) or that Bitter (Adam's Best at Revolution this past weekend). They might not be dead nuts on for the style, but they're going to be damn good. You'll get that huge noble hop character and be able to taste the subtle malt complexity before it fades away under the impact of heat and time. Do yourself a favor and try a style you wrote off a long time ago because of a bad "import" example. A great, fresh pilsner can have hop character that might blow your mind.

 (Yes, yes. I know that there are beers that age well and travel better than the examples I cited. But that's not the point. It's about giving the styles that get a bad rap because they don't travel well a chance.)

Saturday, August 17, 2013

Nerding Out

There's a lot of beer-related information floating around on the internet. You've got the forums, reddit, blogs ranging in quality from ones like mine up to those of professional brewers which all abound with information that tends to be highly opinionated and often representative of the conventional homebrew wisdom. But it's rare to find genuinely scholarly resources.

Thankfully, courtesy of BeerNews I stumbled upon the online archives of the Journal of the Institute of Brewing, which is a publication of the Institute of Brewing and Distilling. There are 119 years (yes, YEARS) of journals at 4 volumes per year. The articles run the gamut from very technical microbiology to theoretical methods for calculating the properties of finished fermentations to higher level summaries of years and years of research.

It's pretty amazing and generous that someone decided to put this massive cache of knowledge out there for the brewing community. Much of the information is well beyond the scope of what a homebrewer (or frankly anyone without a microbiology degree) can really grok, but there are some extremely informative and practical articles in each volume.

Just some quick tidbits from some of the reading I've done:

- Concrete studies on the viability of different hop strains stored in different temperature, light and oxygen conditions. (Some of the conventional wisdom is that temperature is more important than exposure to oxygen. Their study states quite the opposite. Furthermore, different cultivars showed different decays of alpha and beta acids. )
- A summary of the attributes of finished beer which can inhibit or promote the growth of bacteria (good and bad) and specifics about the conditions under which certain bacteria can thrive. Fresh, unisomerized hops inhibit most strains of lactic acid bacteria, but not all. (I knew that aged hops were traditionally used in lambics, but never really made the connection as to exactly why.)
-

Wednesday, August 7, 2013

You Don't Want Every Last Ounce of Beer You Produce

No. Really. You don't.

When I first started brewing, I didn't want to lose a single drop of my precious homebrewed nectar. I paid dearly for that extract and those hops, worked really hard to produce that three gallons of stovetop wort and gingerly poured it all through a fine china cap into a bucket of icewater to cool and dilute it back to 5 gallons of finished wort. 

After fermentation, I'd every so carefully siphon each and every drop of finished beer off of the trub and into the bottling bucket and then make sure I didn't leave even an ounce of beer in my bottling bucket. 

I loved each and every drop of those early batches. You should love yours too.

That said, I've learned that it's ok to leave some of that sweet nectar behind at each stage of the process. Even though I won't get to drink it in the long run, the finished product is better when you anticipate a some waste along the way. If you whirlpool (even with a big spoon), that last half gallon or gallon of wort you leave behind in the kettle happens is thick with hop solids and proteins from your hot break. Leaving it behind will yield a much clearer, brighter finished beer. 

Let your fermentation run its course, and then do whatever you can to drop the temperature for a few days to encourage the solids in suspension to settle out. Then siphon carefully, but leave a half inch or an inch of beer in the fermentor on top of your yeast cake. It's not worth it to risk transferring that crap into your packaged end-product. Dead yeast and spent hops? Not so tasty. Your finished batch will be clearer and more stable. This is good.

At the end of the day, base malt (and even extract) are cheap. 

Using prices for fermentables that are representative of what we see here in Chicago, here are some hard numbers to hopefully demonstrate that it's not a very expensive proposition to make enough wort to leave some behind:

Liquid malt extract (LME) is about $3 / lb. To make 5 gallons of 1.051 SG wort (a 5% beer), you'd use 6.8 lbs. To make 6 gallons of wort and yield 5, you'd use 8 lbs. So as an extract brewer it'd cost you an extra $3.60 to get better tasting, clearer beer. Not bad considering that an extract batch runs anywhere from $30 - $50 for 5 gallons.

If you're an all grain brewer, it's even cheaper. If you buy it buy the pound, base malt runs about $1.25 / lb. To make 5 gallons of 1.052 SG wort, you'd used 9.3 lbs. To make 6 gallons, you'd use 11 lbs. So it'll cost you a whopping $2.13 extra.

It's worth it. Trust me. Between this and the extra buck or two it costs to make a yeast starter, you'll improve the quality of your beer massively over not doing either.

*My assumption is that bittering hops are negligibly cheap and barely affect these costs.

*If you are buying base malt by the pound and brew with any regularity, do yourself a favor and find a local homebrew shop where you can buy it in sack quantity. My cost on 2-Row is about $0.70 / lb. 

Thursday, June 6, 2013

Homebrew Hack : Monitoring Your Fermentation Gravity

At the last Square Kegs meeting, I was talking to some of the other club members about the hack we use to monitor fermentation progress without constantly pulling gravity samples out (or off of) our fermentors. Since it didn't seem like the majority of the club did this or had heard of it, it seems post-worthy.

I can take no credit for this idea. For the sake of argument, I'll just assume that Jeremy stumbled upon this on his own. (I'm sure that someone else out there did this first, but I like giving him the credit.)

Typically I'll take gravity readings throughout our brew day in order to make sure we're on target for our numbers and to determine if we need to adjust up or down towards the end of the boil. Typically I'll pull an O.G. (original gravity) reading during cooling. Then, once fermentation visibly starts, I'll use a wine thief to fill a sanitized sample jar and drop a hydrometer in it. We'll then leave the sample jar full of fermenting wort in our fermentation freezer and use it for gravity readings. Depending on the beer, it can be a little tough to read the hydrometer through the yeast and other trub that accumulates in the sample jar, but it's easy enough to get an approximate reading.

I also realize that technically the volume of wort in a fermentor is going to be a couple of degrees warmer in the middle of the fermentor and that there will be a difference in pressure between the two. However, I think that the reduced risk of infection and the ability to adjust fermentation temperature or dry hop at the appropriate time totally outweighs whatever differences those factors introduce.


Friday, March 15, 2013

My First Foray Into Judging

My homebrew club, Square Kegs, hosted our second annual Winterbrew competition back in the end of January. Jeremy and I had the awesome opportunity to work with the member of our club organizing the competition on a lot of the behind the scenes logistics and to actually judge a couple of flights as we're both taking a BJCP study course currently.


My experience with competitions up to this point had been simple: go online, fill out a form, send / drop off some beer, get a scoresheet back, read said scoresheet and go "hmm, ok. I guess that guy [loved my beer and has the best palate ever! || hated my beer because he doesn't know shit!] (Optionally pat myself on the back for a good score or good feedback.)

This year was really different. There is a ton of work that goes on behind the scenes and ahead of time to prepare. Beer needs to be cellared and cataloged for easy retrieval by the stewards. The flights need to be well organized by category for the judges. Little things like the type of plastic cup, mechanical pencils instead of wood and lighting all matter. From the outside it seems like it'd be a rocking good time : hundreds of beers to try and the judges just "have" to power their way through them in a few hours. Cue mental image of a bunch of beer geeks having a party. Not so. It's a serious, well-organized, highly focused endeavor.

Now The biggest insights I gained were into the actual process of judging. I had a preconceived notion which was largely blown away by reality. Firstly, it's highly subjective and hence really difficult. As a judge, you have about 15 minutes to taste each beer. You taste about 8-10 beers per flight. The beers vary in style, either just a bit for a large, popular category like IPA or immensely for wide-open categories like specialty or vegetable, herb and spice.

I think it's different for really experienced judges who have really calibrated their palates, but as a novice I was evaluating a beer against a written description of what it should be. No matter how elegantly written the BJCP styles are, it's still tough to translate written words into a sensory experience.

This might also change with experience, but I was pretty surprised by the varying sensitivity to different flavors, aromas and off-flavors. I am pretty sensitive to acetaldehyde, but apparently I can't detect diacetyl if it's smacking me in nose.

Finally, I was very surprised at how collaborative the judging process actually is. Often times if there's a wide spread in scores, the judges will discuss the beer and come to an agreement. The goal is to get scores within a somewhat narrow range, but one judge usually adjusts theirs up or down to get there. So the initial feedback about a beer might not really match up to the score it ended up with.

I came away with a whole new respect for the process and a few considerations for entering competitions:

  • If I enter a Belgian, it will not have overwhelming hot alcohol or phenolic (band-aid, hot-dog, nasty) notes. Belgian Styles ≠ I'll just let this ferment however hot it wants too and call it a Belgian!
  • If I enter a spice beer, I'll use a tincture or some other controlled means of adding the space after the beer is done fermenting. Or I'll split the batch and blend it back. Far too many of the beers I tasted had massive, overwhelming spice character.
  • I'll be really careful about categorization and specifying the base category on anything specialty. It's really hard to judge a beer if you have absolutely no idea what it is...


Wednesday, March 13, 2013

First Medal!

Jeremy and have entered beers in two competitions so far this year. (We also helped to run one that our club, Square Kegs, put on. That's another post.)

That's a medal all right. More nerdy photos on instagram
We entered a handful of beers in both and won our first official medal! It's definitely a proud moment, particularly given the size of the Drunk Monk Challenge competition this year (806 entries) and the size of the Porter Category (29). We brewed the Robust Porter recipe out of Brewing Classic Styles and took third place with a score of 34.

Interestingly, we also entered the same beer in our Winterbrew competition and scored a 32.5 a month ago. The judges notes were all generally aligned, but I was particularly impressed by the feedback from a master judge who picked out the one major process flaw in the beer. We brewed on December 1st here in Chicago and ended up mashing at 151F instead of our target of 154F. (It gets cold here. We use coolers and a single infusion. For now.)

Empirically, we're getting better as brewers. The beers we entered in competition last year averaged high twenties with one outlier in the high thirties. This year, we're averaging mid-thirties.

Here's a recap of our entries and scores:

Winterbrew 2013:

Munich Helles: 34
Robust Porter: 32.5
Rye Pale Ale: 32
Russian Imperial Stout: 32.3

Drunk Monk: 

Robust Porter: 34
Russian Imperial Stout: 24
* I'm fairly certain that we mis-categorized the stout by not entering it as a wood-aged beer. It was in a 5 gallon whiskey barrel for a month and interestingly enough, won a club competition which coincided with Goose Island's Quest for the Imperial Goose.

Saturday, February 16, 2013

Carbonation, Perceived Bitterness and Carbonic Acid

It's wild how we can keep increasing our vocabulary for and our ability to detect and identify different sensations and flavors in beers. Malt, hops and yeast derived flavors all get a lot of credit in this department, but I think carbonation tends to get missed as a major contributor. Particularly since trying to dial in our carbonation levels for competition (that's a whole separate post for a future date), I've really started to notice how carbonation can alter the flavor of a given beer.

It's pretty common knowledge at this point that a well-poured beer has a nice rocky head on it which laces its way down the glass as you enjoy your beer. It's also fairly clear that one of the important contributions from carbonation is to help carry the subtle, more volatile aromatic compounds up and out of the beer and into your nose. Without that, you wouldn't perceive much of the pungent herbacious, fruity, spicy notes from late hop additions and you'd miss out on many of the chemical compounds produced by the yeast as fermentation by-products. Lastly, it's pretty self-evident that carbonation affects how you "feel" a beer in your mouth. It combines with proteins, residual sugars and other carbohydrates to create the slight to moderate viscosity we associate with a beer. To little carbonation can leave a beer feeling thin and watery, where as the ideal level creates a pleasant tingling sensation and an appropriate perception of body.

However, it can also play some other significant roles. As CO2 goes into solution, it doesn't simply dissolve into the liquid and magically stay gas. It reacts with the water and reaches equilibrium with some part of the gas having combined with the water to form carbonic acid. (CO2 + H2is in equilibrium with H2CO3)

The chemistry gets complicated (and to be honest is way beyond what I remember from college chemistry) at this point, but the formation of carbonic acid under pressure contributes in a material way to the acidity of the beer. In beer conditioning, we're always adding CO2 to our beer under some sort of pressure either by bottle conditioning, by force-carbonating in a keg, or by adding CO2 to a bright tank in a commercial brewery. As the level of partial pressure goes up, the acidity of the solution does as well. Looking at this table shows that at 1 atmosphere of pressure (about 15 psi), the acidity of a water - CO2 solution is 3.92. At 2.5 atmospheres (about 37.5 psi, which also happens to be the level of carbonation in soda) it drops to 3.72. The pH of finished beer tends to be around 4, so as we're conditioning and carbonating our beer, we're actually making it slightly more acidic.

[[Quick refresher on pH: It's a logarithmic scale from 0 to 14 with 7 being completely neutral, 0 being massively acidic and 14 being wickedly basic. Logarithmic means that a change in one number on the scale represents a ten-fold change in acidity. So a pH of 5.0 is ten times more acidic than a pH of 6.0.]]

And so what? I'll answer that. On my palate, highly carbonated beers come across as both more bitter and slightly "sharper" on the tongue. I'm not totally sure what drives the latter sensation, but I'm guessing that the latter is from the acidity. I've picked it up in the difference between un-carbonated wort before conditioning and the finished product. Ashley is particularly good at tasting a sample of young beer and letting me know that it needs a couple more weeks or that it's too flat. It's also readily apparent (at least to me) on very highly carbonated beers and particularly so in beers inoculated with a Brettanomyces strain and bottle conditioned.

My buddy Jeremy and I recently had a bottle of Sierra Nevada / Russian River Brux. When we first poured it cold, there was a massive amount of carbonation and the beer was particularly sharp on the tongue. It came across as bitter and rather monodimensional with a mild Brett character. However, as we let the beer warm and degassed it with some aggressively beer-snobbish glass swirling, the more subtle characters than Brett can and will really came through. The bitterness and sharpness faded from the foreground and let notes of lemon, mild pear, pineapple and some of the characteristic barnyard or horse-blanket (nowhere near as nasty as it sounds) come through.

So the next time you're sampling a beer (homebrewed or commercial), pay attention to the level of carbonation you can feel on your tongue and how you're perceiving the beer. If it's too sharp, too bitter or too bubbly, let the glass warm up and give it a few swirls to knock some of the CO2 out. It might be a little more to your liking. Or if it's a homebrew that's flat and lacking some of the pronounced bitterness you were trying to get, dial up the pressure on your kegerator for a few days and try to taste the difference.


Sources and References:
http://en.wikipedia.org/wiki/Carbonic_acid
http://www.kegerators.com/carbonation-table.php

Tuesday, September 11, 2012

Brewing Salts Really Are "Seasonings" For Your Beer

Now not to get ahead of ourselves, the flavors in your beer predominantly come from malt, hops and yeast byproducts. So as I've said before, dial that shit in before you start screwing around with your beer. Otherwise, it's analogous to dumping a full salt shaker onto a well-done steak and expecting that to magically transform it into a perfectly seared, crusty but medium rare and juicy steak. It just doesn't work. Now you're just eating an extra salty piece of crap instead of a piece of crap.

But once you've honed your process and want to think about tweaking the flavors in your beer to really bring out the profile you're looking for, it's time to start thinking about water treatment. (This post is only about the flavor additions - there's a lot more to water treatment. See this other post.)

Sulfate (SO4) and Chloride (Cl-) are the two primary ions which have an impact on beer flavor. The presence and concentration of either ion independently appears to be less important than the actual ratio between them. A ratio which favors a higher Chloride concentration will accentuate malt (bready, toasty, caramelly) flavors where a ratio with a higher Sulfate ratio will highlight hop bitterness and sharpness.

Jeremy and I have only really just started to successfully tweak this ratio of salts in our beers. We've brewed three batches of Russian Imperial Stout over the past year or so, partially out of need to fill a five gallon used whiskey barrel we bought this past winter. The first two batches were brewed last fall and were pretty solid, well executed beers. But something was missing. They lacked the velvety, chocolatey notes which make a big stout the kind of beer you want to slowly nurse out of a snifter, savoring the aroma and pairing with a brick of blue cheese or a cigar.

In hindsight, we totally screwed up the water treatment. We'd been brewing hoppy beers all summer, and without a real insight into the balance necessary in our water, dumped a boatload of gypsum into the beer. Our Chloride to Sulfate ratio was something like 1 : 3, which completely over-accentuated the bitterness and downplayed the malt. On our re-brew we were 1.5 : 1. The third round has those massive chocolate, stone fruit and roast notes that make it characteristic of the style.

Furthering the cooking analogy, the first two stouts were nicely cooked steaks but lacked something almost intangible. We made a tiny adjustment, just like learning to salt the meat and let it warm up to room temperature in order to create that perfectly caramelized crust. The more I brew, the more these little adjustments start to really matter and impact the finished beer.

(Bad choice on the analogy. Now I want to eat a steak and drink one of those stouts at 8 in the morning...)

Sunday, September 9, 2012

Barrel Yum Yum


Oh what's that? 5 Gallons of Russian Imperial Stout getting dumped from a used blue corn whiskey barrel? Yup. It is. Round 3 of this recipe, competition bound... 

(Sorry - no useful information here today. Just a little bit of beer porn.)


Monday, September 3, 2012

Water Basics

I had the opportunity to talk about the basics of water as it relates to brewing with the soon to be founder of Panic Brewing at the last Square Kegs meeting. Rather than re-writing the whole talk, I've posted the notes here. Gary took the liberty of adding some of the more technical details based on his education at the American Brewers Guild.

You can check it out here.

Saturday, September 1, 2012

A Tale of Two Pales

These are actually the same beer. Same malt bill, same process other than a slightly longer mash on the darker one, different hops in the same quantity, and different carbonation levels. The left beer was hopped with Pacific Gem (13.2% alpha) and Australian Galaxy (13%) and the right was Columbus (13.9%) and Simcoe (13%). Never mind the shitty picture quality - you can still get the point.)

They're all small differences, but this is one of those one of those experiences that continues to blow my mind and preconceived notions about what matters in brewing.

I'm not sure where the dramatic difference stems from, but here are a few possibilities:


  • There are a few episodes of Can You Brew It where Jamil talks about how particulate still in solution in the beer can actually make it appear lighter. 
  • The actual oil levels in the hop combinations were different. I know that hops and yeast tend to do a little chemical dance at different points of fermentation, so it's possible that the beer on the right flocculated out better because of this.
  • The dissolved volumes of CO2 were different (I carbonated the left and Jeremy did the right), which again could affect color
  • One of the two beers (I didn't take great notes on the order we brewed them in) was mashed about 15 minutes longer than the other. I don't think that would have a significant impact, but in this case I can't rule it out.
So ultimately I don't really know how two beers with the same malt bill ended up looking so different, but it was an eye opening experience. 

Monday, August 20, 2012

10,000 Hours?

Hey J - you look pretty bored. Oh and Diesel is characteristically
not giving a shit about anything. Except maybe that squirrel.
In his book Outliers, Malcolm Gladwell talks about the 10,000 hour rule. His poses the theory that to really reach mastery of any skill or craft you need to spend at least 10,000 hours honing it. He talks about the Beatles spending 10,000 hours over a few years playing in Hamburg Germany and about Bill Gates growing up spending his weeknights and summers in a computer lab starting at a young age.

I'm positive I haven't spent ten thousand hours brewing. Since I started tracking with BeerAlchemy in December of 2010, I have brewed 32 batches (195.75 gallons) either solo or with Jeremy. I started brewing in early 2004 and conservatively did about another 30-40 extract batches in that period of time. That probably works out to a bit under 1000 hours of brewing and cellar maintenance during fermentation. I've listened to most of the programming the brewing network has put out there, read a rather ridiculous volume of books and blogs, and certainly spent many many hours seeking out and trying new beers.

All in all, I really don't know how much time I've spent in the hobby and related activities. But what I do know (and the picture in this post sums it up well) is that it dawned on me this Sunday that there were certain points of the brewing process during which Jeremy and I didn't even need to talk this weekend. We just flowed from one task to the next, having dialed in our process on our equipment. I was laughing about our first all grain effort in which we screwed up royally on the mash temp, didn't quite hit our numbers, spent the whole time freaking out about whether we were screwing it all up and just barely made it through the whole process in 7 or 8 hours. Contrast that with a day which looked a lot like that picture. Mostly we just stay a couple of steps ahead and then sit around and way until it's time for the next burst of activity.

I don't purport to be an expert. We're just barely scratching the surface of making predictably good all grain beer and understanding how the inputs actually affect the finished product. But I think Malcolm's on to something. Maybe in another few years when I actually hit that 10,000 hour mark I'll start taking home some competition medals or even a best in show. Although at this point, I'm not really that worried. I'm having way too much fun along the way.

Friday, August 17, 2012

Rebrew: Citra IPA

As Jeremy and I have really started to dial in our all-grain process, we've gone back to a couple of beers we brewed last summer and brewed them again. I'm still on enough of a learning curve that we've been able to noticeably improve on those earlier attempts.

In particular, we re-brewed a Russian Imperial Stout early this spring which we'd done in the fall. The original beer was pretty solid, but lacked the velvety, chocolatey notes which really needed to shine for it to be great. We treated the water with a mix of Calcium Choloride (CaCl2) and Gypsum (CaSO4) this time around instead of a single CaSO4 adjustment in the fall. We also pitched onto yeast cakes from ten gallons of Ordinary Bitter brewed the week prior. Between those two small tweaks, we ended up with a far better end product. The aforementioned chocolate and coffee notes were there. Using a substantially larger pitch of yeast got us to a better finishing gravity, and using a slightly different carbonation level produced just the right level of carbonation.

So up next, we're re-brewing our Citra IPA from last summer. It was already a damn good beer, so we wanted to brew it again this year. However, given the opportunity to tweak a few things I wanted to tune up the malt profile a bit and accentuate the unique character Citra brings to the party. Based on the recent process improvements we've made to improve on our hop character, I'm pretty confident we'll get there by using a low temperature whirlpool addition. With the malt character, we're going to use an English Ale yeast (Wyeast 1335) which should accentuate the bread / biscuit character a bit more than a clean american ale yeast. We'll probably also tweak the water adjustments a bit and go with a mix of calcium chloride and gypsum instead of strictly gypsum.

The yeast starter is going and brewday is Sunday. I'll have some results in a couple of weeks!


Thursday, August 9, 2012

Wine Yeast Mythbusting

I listened to an episode of The Brewing Network's Sunday Session yesterday which featured an extended talk with Shea Comfort, a consulting winemaker who has adopted the moniker of "The Yeast Whisperer." (For those of you who listen to the BN regularly, there's a brief snippet where JP launches into a Caesar Milan impersonation where he's ranting about how "The yeast need to know that you are in control. You most be dominant over your yeast..." etc which had me rolling!)

Shea knows yeast. He presented a ton of useful information about yeast in general and wine yeast applications in beer in particular. There's a whole separate portion of his talk about using wine yeasts in beer in order to get some very distinct flavors. I'll save that for a separate post since I'm now pretty interested in doing some experiments with it.

He also cleared up some of the misconceptions that seem to be held pretty commonly amongst brewers about wine yeasts.

  • Wine yeasts fall into one of three categories: Killer, Neutral, or Susceptible. Yeast, being a living organism with a desire to reproduce, have evolved over time. Some strains within Saccharomyces Cerevisiae (wine and ale) have developed the ability to produce and release a protein which literally stops other susceptible strains of yeast from fermenting. Many of the wine strains fall into this category. All (or most) of the beer strains are susceptible. As such, pitching Champagne yeast into an active beer fermentation will eradicate your beer yeast within about 12 hours.
  • Wine yeasts are bad at breaking down maltotriose and other higher-order dextrins produced by mashing malted barley. Beer yeasts are also a little lazy and will start by eating glucose and maltose before moving on to maltotriose. If you're scratching your head, here's the practical application: Pitching Champagne yeast into a stuck fermentation likely will not "dry out" your beer and take it down to the final gravity you're looking for. If you have a stuck fermentation, your beer yeast has probably chewed through most of the lower-order sugars and is getting lazy about eating the higher order sugars. The wine yeast can't eat them and it'll kill your beer yeast once you pitch it. So you'll just have another layer of flocculated yeast in your fermenter at the same gravity. The only situation where this will actually help you is if you've handled your beer yeast poorly and it crapped out for a different reason. (Lack of nutrients, oxygenation, temperature stress, etc.)
  • So in the case of a stuck fermentation, Shea recommended using enzymes which replicate the process which takes place in your mash. (He recommended using Convertase.) There are commercial enzymes which exist for use in brewing and distillation which will break down higher order dextrins into more easily fermentable compounds. Dosing stuck fermentations with a very small amount of these enzymes will help your lazy yeast out, and if done properly will help you nail your target final gravity without completely fermenting out. (The enzymes are essentially a protein which gets denatured and has limited capacity to convert higher order sugars, so they will run out of steam after a certain amount of activity.)
I have yet to try any of the techniques he mentioned, but you can be damn sure I will be running some experiments...

Wednesday, August 1, 2012

Rites of Passage

I was doing some cleanup after our last batch and noticed that one of my Better Bottles had some cracks in the bottom rim. It's not the first piece of equipment I've had to retire. I had another Better Bottle which I've designated for Brett fermentation only, an autosiphon which has visible scrapes and scratches all over the inside of it which I pitched, a few beakers which were process casualties and at least a couple of stir bars which made their way down the drain. And not to mention Jeremy and I have started following Jamil's recommendation and replacing all of our soft plastic tubing every year.

All in all, equipment casualties do seem to be par for the course in order to maintain proper sanitation. Given space to "cellar"beer (at least to the best that my basement can maintain cool temperatures during these Chicago summers) we've seen infection crop up in beers after they sit for a while. I know that there's some wild yeast and bugs floating around in my back yard and basement, but changing out equipment seems to have bought us more stable beer for now.

It's not just equipment that starts to fall by the wayside as you get better. Once we hit the point where our beer started to consistently taste really good, it stopped making sense to stretch ingredients. Old hops which had sat warm or grain which had not been properly stored got pitched, as do anything which doesn't taste or smell right before a brew day. Ultimately it's a little less economical on the front side, but I'd rather spend a few extra bucks on equipment and ingredients than end up dumping a whole batch because of contamination. And I'm pretty sure we're all in this hobby to make good beer, right?