Thankfully, after doing my research, it turned out to be a relatively quick project to modify the stock equipment which comes with the Danby so it'll easily switch back and forth between Cornelius and Sankey kegs.
Here's the parts list (with part numbers from Northern Brewer - no commercial affiliation - I've just had great luck with them.)
3/15/2012 Update: They're now selling everything in a single kit!
| 1x | Ball Lock 1/4" MFL Gas Disconnect | [K010] |
| 1x | Ball Lock 1/4" MFL Liquid Disconnect | [K011] |
| 1x | 5/16" Barbed Swivel Nut | [K163] |
| 1x | 1/4" Barbed Swivel Nut | [K123] |
| 2x | Tail Piece 1/4" MFL | [K027] |
| 3x | SS Worm Gear Clamp | [K124] |
| 1x | Teflon Tape | [K089] |
| 1x | Petrol Gel Lubricant | [K031] |
| Optional / Unused | ||
| 15x | 5/16" Beverage Tubing | [K201] |
| (To move CO2 tank off of the fridge) | ||
| 2x | Neoprene Beer Washers | [K030] |
| 1x | Gas Leak Detector | [K224] |
- Let's take a look at exactly what came with the kit. The CO2 cylinder and regulator will work as provided. However, the adapters on the Sankey tap and the adapter on the beer line which feeds the tower need to be changed.
- Cut the line coming out of the tower just after the permanent tubing clamp which attaches to the Sankey tap, preserving as much of the original line as possible. Fit that line with both a hose clamp [slide on to the tubing before shoving the barb in] and the 1/4" barbed disconnect.
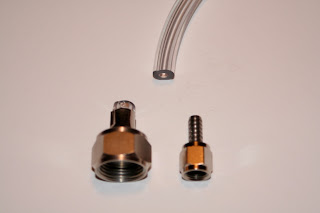
- Similarly, we'll put a hose clamp on either end of the gas line, attach one end to CO2 regulator and the other to the 5/16" barbed disconnect. Be sure to tighten the hose clamps as tightly as you can without breaking them.
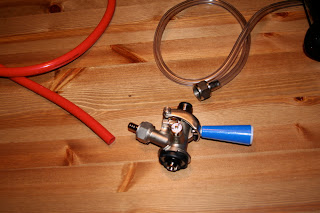
- Next up, we'll modify the Sankey Tap to work with the new smaller disconnects. Here's a before picture of the tap. You can see that both the gas and liquid sides use standard beer nuts.
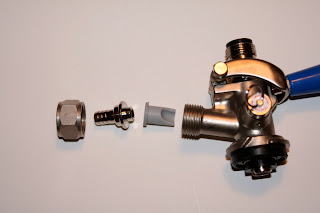
- So, we'll use the beer nuts which came with the tap and just swap out the fittings for the two 1/4" MFL tail pieces. I ordered the neoprene washers to fit between the tap and the tail pieces, but it didn't appear necessary to use them. Here's an exploded picture of the tap before re-assembly.

- That's it as far as surgery goes, so all you have to do now is decide whether you're going to drink a commercial keg or a homebrew keg. Be sure to wrap the 1/4" MFL fittings on either the Cornelius disconnects or on either end of the Sankey tap with teflon tape or use the two flared nylon washers when attaching a keg.
- Here's a picture of the conversion with disconnects side by side:

- Drink some beer!


