Friday, December 30, 2011

Reusing Star San

I switched to Star-San earlier this year and have been pretty happy with the product overall. However, having just recently bottled up ten gallons of Russian Imperial Stout, and looking at bottling a five gallon batch of lambic and a few assorted other brews, I stand to keep using the stuff at a pretty quick rate. I'm on my second large bottle this year and it definitely adds up. 

I'd read in a few places that one can re-use it as long as the pH stays below 4 (although 3 seems better if you can store that strong of an acid) and it's clear.

So here's my plan to start doing so:
  • Buy some pH test strips which read down into the 2.x range
  • Mix it with distilled water instead of tap water
  • Store it in an unused, PBW'd corny keg or a heavy duty plastic bucket with a lid
  • Test the pH before each use and either add more concentrated Star San if it's still clear or dump and start over if the liquid is cloudy
Anyone else out there had experience with this? I'll follow up on how it works for me.

Monday, December 26, 2011

Extract Process (Revisited)

Faced with a Chicago winter (albeit an unseasonably warm and dry one - knock on wood) I've moved my brewing inside for the winter and switched back to extract as an experiment. Having developed a solid all-grain process, I'm going to try to incorporate what I've learned into a better extract / stovetop process. If you're just starting out, this should provide a good outline for a regular brew day. Just ignore the steps you don't know anything about or don't have equipment before.

So without further explanation, here's a first crack at it:
  1. [24 hours ahead of brew day] Prepare my yeast starter
  2. [24 hours ahead of brew day] Freeze the chill stick (I work in the restaurant industry at my day job...)
  3. Get all of my ingredients and necessary equipment together
  4. Fill the fermentor with sanitizer and sanitize the transfer hose, airlock, carboy bung, and oxygenation rig
  5. Get my instruction sheet out (seriously)
  6. Fire up the ten gallon kettle with a spigot and fill with 6.5 gallons of distilled or reverse osmosis water
  7. Treat with Gypsum or Calcium Chloride only to accentuate bitterness or malt flavor, not to adjust pH. (Extract removes the need to worry about this.)
  8. Steep the specialty grains while heating the brewing water up to a boil. (140F for 10-20 minutes. Although exact time and temp don't matter that much from what I understand.)
  9. Ramp up to boil with my weak-ass gas range (It take two of the burners to get the ten gallon pot rolling.)
  10. Add fermcap
  11. Add the extract and hops per my recipe, making sure to add whirlfloc at 15 minutes
  12. Kill the heat and whirlpool with the chill stick for about 15 minutes
  13. Take a gravity reading and adjust for wort temperature
  14. Transfer 5.5 gallons to the fermentor
  15. Add more fermcap
  16. Oxygenate for 15-30s, depending on the gravity of the beer
  17. Pitch the starter once the wort has cooled to roughly 64F
  18. Seal it up and drop it in the fermentation fridge, racking a small sample into a test jar with a hydrometer in it for watching the gravity.
  19. Keep the temperature steady for the first 72 hours and then ramp up the temperature up 4-6 degrees F during the last 25% of fermentation. If the recipe calls for dry hopping, this is the time to do it.
  20. Once fermentation is complete, let the beer sit for a few days at the final temperature, then cold crash in the fermentor to 34F. 
  21. Let the beer sit for another 1-2 weeks on the yeast to let them do some further diacetyl cleanup and the other good work they do.
  22. Rack 5 gallons of "bright" beer to a corny keg and force carbonate with CO2 to get to an appropriate level for the style.

Saturday, December 24, 2011

Some Thoughts on Brewing to Style

In one of my earlier posts, I talked about my plan to brew a handful of extract recipes from Brewing Classic Styles this winter. Part of the reason the "classic styles" the BJCP recognizes evolved was the water supplies in different brewing cities. (This is a logical extension of my post yesterday.)

It's an example of human ingenuity allowing our predecessors to adapt to their surroundings. I'm pretty sure that some Irishman way back in the day didn't say to himself "Hmmm. I'd really like to make a jet-black, roasty but balanced beer." or "I bet if I throw a bunch of this malt that I accidentally burned the crap out of while trying to dry it out into my standard recipe it'll taste better." Someone just did it by accident or out of necessity and noticed that it tasted better than the way they were brewing before. I haven't done extensive research on the topic, but my guess is that the styles evolved out of necessity.

So I have to ask the question - what's with the obsession with style? I get that having a common framework to talk about our beers makes sense. Hell, I've been brewing a handful of the styles lately to get a better sense for what works in a recipe. I want to know what flavors a single grain, hop variety or yeast strain contribute to a beer. It's really helpful to know what ingredients or process make two beers that look very similar on paper taste completely different. That makes me a better brewer.

But when it comes to designing new recipes or classifying some of my absolute favorite commercial beers, the importance of style starts to fade. The Citra IPA Jeremy and I recently brewed was amazing and did fit into the IPA guidelines, but it wasn't quite bitter enough for his tastes. Firestone's Double Barrel Ale is an amazingly executed "English Pale Ale", but it doesn't come close to fitting any of the classic English Pale Styles. Lagunitas's Little Sumpin Sumpin is an undeniably delicious beer that doesn't come close to anything in the BJCP.

There's even a budding category that the BJCP is going to have to recognize soon - the Black IPA (or cascadian dark ale, the heavily pacific hopped robust porter, or whatever it is you want to call it.) And that's my point. The collective knowledge of brewing science has evolved far beyond what the Bavarians knew in the 1500's when they developed some of the styles that have made their way into what we recognize today or what the monks in Belgium understood. We have universities studying fermentation science. We have better malts, new hop varieties and a far greater understanding of the chemistry involved in the brewing process. We have the ability to brew beers that simply couldn't have existed a hundred or five hundred years ago. So brew like a homebrewer and don't be afraid to experiment. Throw some Pacific coast hops into your German Pilsner or use that Belgian yeast in your porter. Let your palate tell you whether the end result is great or not so good. Use the styles as a framework, but don't be constrained by them.

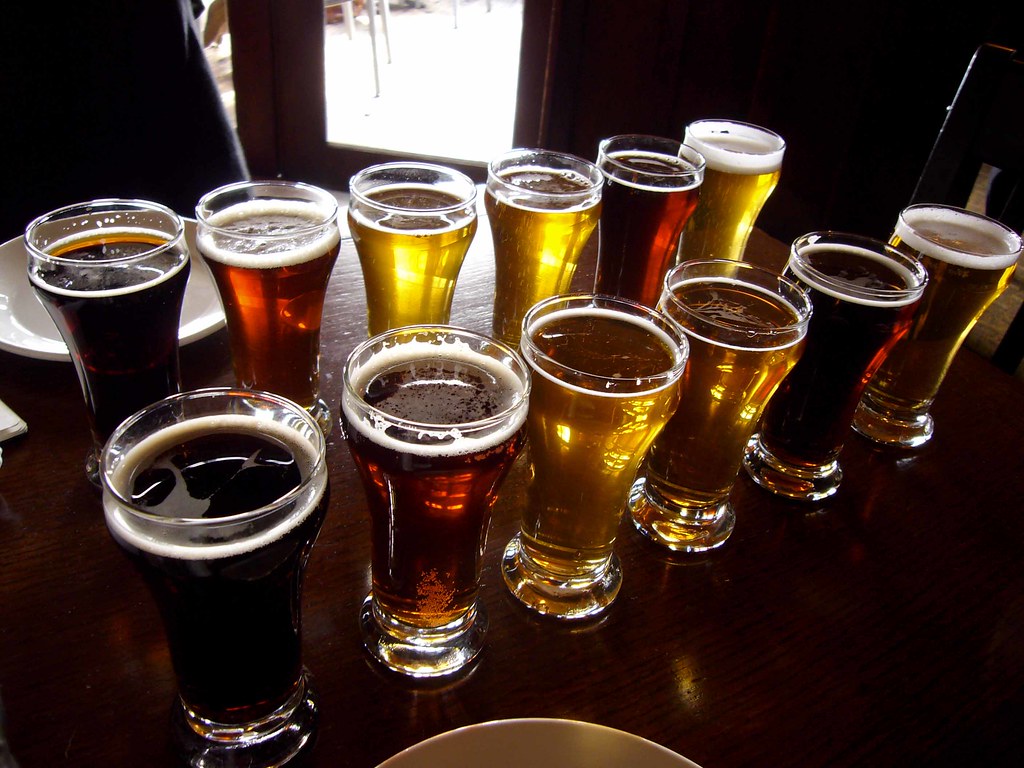
(Image used under the creative commons license. Original is here. You have to love Flickr.)

Thursday, December 22, 2011

Things I Wish I'd Known

I've been listening to some back episodes of Brew Strong during my commutes this past week and particularly those about brewing water. There's a ton of useful information in them about how water chemistry makes a difference and some pretty advanced information about how to adjust your brewing water for different styles based on the grain bill you're using and your local water. I'll save that for a future post.

However, there are some really simple take-aways which I wish someone had told me early on:

  • There's a historical reason that certain cities brewed different styles of beer. More alkaline water supplies need to be balanced with roasted, darker malts. They contribute a lower pH to the mash and brewing process overall, which gets the mash pH and final beer pH into the optimal range. Likewise, cities with more neutral water supplies brewed lighter colored beers because they didn't need the acidic contribution of the roasted malts.
  • If you're an extract brewer, use distilled water. The malt extract you're using already has an appropriate mineral content, acidity and hardness for the malts used to make it. Don't bother with anything else.

(Image used under the creative commons license. The original is here.)

Sunday, December 18, 2011

A Little Bit of Beer Porn

Happy Hannukah to me.


(Sorry about the slight blurriness in the picture - I took it on my phone because I wanted to get all of this properly stashed away in the fridge.)

Sunday, December 11, 2011

Brettanomyces

I brewed a dark cherry lambic back in June and it's been aging in a carboy since. I'd only made one prior attempt at a lambic much earlier on in my brewing career, which I ended up dumping. Thankfully I've learned enough about yeast, bugs, and sanitation that I understand what I did wrong the first time around. This batch looks and smells like it's supposed to, although I haven't tasted it yet to be sure how it's coming along. I thought everything was good. I was wrong.

It seems like I either have brett lurking somewhere in my equipment or I have a natural source of wild yeast in my back yard or basement. Since then, I've had one batch I tossed because of contamination and traces of it show up elsewhere.

The first hint that something was up was a ten gallon batch of Firestone Double Barrel Ale clone which was split into two fermentors and pitched with two different yeasts. One of the batches turned out amazing, and the other was infected. The process for both was literally identical up to the point of pitching. The results couldn't have been more dissimilar. The aroma, taste, and even then color of the two beers was distinctly different.

So after a bit of research, I tossed all of my old plastic tubing, and brewed a batch of my ginger wheat which I fermented in a V-Vessel. (Separate post on that at some point.) I racked a gallon off into the sanitized, but possibly contaminated better bottle and let it sit for a couple of weeks. The test was inconclusive, and in hindsight I probably should've bottled up the results and done a "forced" conditioning at high temperatures to see if there really was anything at work.

But in any case, here are the steps I took / have taken since.

I bought a new better bottle and hardware for it.
I replaced all of my tubing and hoses used on the cold side of the process.
Instead of using a brush and mild detergent, I upgraded to PBW for cleaning the Better Bottle.
My keg cleaning regimen now involves a soak in PBW, scrubbing, a rinse and then a soak in star san instead of just a water rinse / scrub and a sanitizing cycle.
I've started buying fresh, clean bottles for anything which is going to need to age and only using recycled bottles for short term transportation.
As much as my limited space permits, I keep all of my aging beer cold.

After all that, I can't definitively say that I've beaten or contained that troublesome but wonderful bacteria lurking in my brewery somewhere, but I do brew with more confidence that I won't have to pitch any more batches soon.

Anything I missed?

Saturday, December 10, 2011

Drinking Locally and Learning to Love Small Beers

One of the local options here in Chicago I've really come to appreciate over the past six months or so is Half Acre Beer Company. I tried some of their beer early on when they were still contract brewing up in Wisconsin and wasn't really impressed.


However, I came back to Daisy Cutter and Gossamer earlier this year and had a totally different impression than that of the Lager. They're both smaller beers, with the Daisy Cutter as a pale ale coming in at 5.3% and the Gossamer as a golden ale coming in at just over 4%. They're both great examples of their respective styles, although I think that there's a significant difference between canned and draft Daisy Cutter.

In any case, one of the things I really enjoy about both of these beers is that they really work as session beers. The Daisy Cutter has a nice hop presence which makes it a good option to substitute in for an IPA and the Gossamer is just a well-executed, very drinkable beer. There were a few years where I was all about big beers with big flavor and big alcohol, but the more that I've brewed the more I realize that it takes a very particular type of skill to brew a smaller beer that still tastes incredible.

So my hat's off to the brewers at Half Acre. They turn out some great products and it just feels good to know that my beer dollars are going back to a business that is literally three miles from my house.

Now about that four pack of Over Ale in my fridge...

Wednesday, December 7, 2011

Oak Aging Experiment (Setup)


At some point while I was sitting at the Bears game and freezing my ass off last weekend, my thoughts drifted to how nice it would be to have a flask of something strong and brown to warm me up. Naturally I then drifted on over to beer and how it'd be nice to oak-age some of the Russian Imperial Stout we've got left after the angriest fermentation I've ever witnessed...
Thankfully, I had some medium toast American oak cubes left over from the Firestone Double Barrel Ale clone Jeremy and I brewed towards the end of the summer. So after a bit of researching proper oak handling and the appropriate quantities to use for aging on a homebrew scale, here's what I did.

  • The consensus seems to be that 1-2oz of cubes per 5 gallon batch is about right. Since I'm going to be aging in 1/2 gallon growlers, I measured out 4 x .2oz (6g) portions of oak cubes. (The thought here is also that cubes give a more complex, layered flavor than chips. Since this is already a big, complicated beer I wanted that complexity instead of just straight oak flavor.)
  • I boiled some water and poured enough over each portion to cover the cubes and monitored the temperature to make sure it stayed over 180F for 20 minutes to pasteurize the cubes
  • At the same time, I sanitized the jar which would hold half of the cubes and a generous measure of bourbon.
  • While the chips were pasteurizing, I sanitized two growlers, complete with stoppers and airlocks.
  • I also sanitized the shiny new beer gun Jeremy and I went in on...
  • Back upstairs, I transferred half the cubes into each of two sanitized jars and added some Maker's to one set to soak for a few days.
  • Set up the beer gun and filled the two growlers, adding 6g of cubes to each.

And now we let them age for a couple of months. It's going to be difficult to stare at those growlers and wonder what delicious chemical magic is going on inside of them, but I'm sure that the end result will absolutely be worth the wait.


I'll repeat with the bourbon soaked cubes this weekend when we bottle off the rest of the batch. More to come on the Blichmann Beer Gun, but my initial take is that it f'ing rocks.


My Local Homebrew Shop

As far as I know, there are three homebrew shops in the city of Chicago proper. (One of them has a handful of locations, so technically there are six or seven actual "storefronts".)

However, there's one which very recently opened up and definitely stands out from the rest. Brew Camp (in the Lincoln Square neighborhood, which happens to be really close to my neighborhood) does some things differently from the other options and does them well.

They engage with their customers on both Facebook and Twitter and actually respond to questions and comments that people post. I'm still not entirely sold on the overall impact social media has on a business, but the guys here are definitely using it to their benefit.

They teach brewing classes for beginners at their space. This has to be one of the best ways to get people over the initial learning curve and into the hobby.

They are working with my local homebrew club to put on a competition this January and hosted the last meeting in their space.

In short, they're engaging with the brewing community here in Chicago in ways other than simply letting people come in to their store and ask for advice. In a small niche business like this one, it absolutely sets them apart from their competition. I'd much rather shop somewhere that I know my dollars are going to support people who are ambassadors for the brewing community and truly passionate about beer.

(I don't have any connection to Brewcamp, nor do I have any commercial interest in writing this post. I'm simply someone who's been really impressed with them thus far and thought they deserved another positive mention.)


Firestone Union Jack in Chicago!

I've been a huge fan of the Firestone Walker beers for a while now. One of my best friends was out in San Luis Obispo for a few years for work and turned me on to their products while you could still only get them in California, Nevada and Utah. I'm pretty sure that in my nascent appreciation for craft beer I read an article in one of GQ or Esquire which named it the best beer in America as well.

In any case, my buddy was nice enough enough to smuggle some bottles home every time he was back in Chicago and then continue to do so when he swung back through California after relocating back to Chicago. So up until last January, I only had occasion to drink their beers on very rare occasions. Thankfully, they released the proprietor's reserve series here and made the Double Jack and Walker's Reserve available here in 22's and on draft.

And now as of a month or so ago, they've released Union Jack in both six packs and on draft. I am a happy Firestone fanboy. It's definitely my go-to house IPA when I don't have one of my own on tap.

After the homebrew club meeting last week, a handful of us ended up at the Bad Apple which happened to have Union Jack on draft. Most of the guys hadn't tasted it previously, but by the time the little lady and I left the better portion of our group was drinking it.

Well done Firestone crew. Now you guys just need to figure out how to get the Double Barrel Ale out here!

Sunday, December 4, 2011

Epic Blowoff (Part 2)


Believe it or not, these two better bottles each started with the same amount of beer in them. I posted a picture earlier of the mess the one on the right made all over the bottom of the fermentation freezer. I'm not totally sure, but I think it managed to blow off about a gallon and a half. I honestly can't even believe that this fermentation produced enough CO2 to turn all of that wort into foam and then push it out through a 1/2" blowoff tube and out of a growler. Totally ridiculous.
The batch on the left had a lower OG (although still a big beer at 1.095) and tasted pretty delicious when I took a sample transferring it to a keg for pre-bottling carbonation. The batch on the right started at 1.106 and definitely needs some substantial time to mellow out. It still has some really strong coffe / astringent notes which dominate the taste of the beer. I'll follow up on it in about 3 months...


Friday, December 2, 2011

My Local Homebrew Club

After a summer of intense learning and brewing, joining a club stood out as one of the things which I hadn't started to do yet. It just so happens that there's a club literally in my neighborhood and one of the guys who started it owns a small (non-beer related) store which I frequent on a regular basis.

Last night I finally made it to a meeting and even convinced the fiance to come with. (Luckily for me, she not only tolerates the massive amount of brewing stuff at the house but she actually is a huge craft and homebrew fan who has pretty extensive knowledge at this point. Subject for another post.) I was pleasantly surprised at the number of brewers in attendance, the range of skill levels, and that they're holding a competition in January.

There was a short presentation by a BJCP judge on the different style categories and what to expect when entering your beer in competition, followed by a hour and change of socializing and trying other brewers' beers. This is definitely the fun part. It's awesome to talk to so many other brewers in a concentrated, in person setting and to try so many other home-brewed beers and listen to the brewers talk about how they made them.

I'll definitely be entering the last of the Octoberfest we brewed in September, a lambic that's been aging since June and possibly the double IPA Jeremy and I are about to brew in the competition.

Wednesday, November 30, 2011

Hop Utilization (A Geeky Take)

One of the lessons it really took me a while to learn is how different hop additions truly affect the finished beer. I started to really get into craft beer (which at the time was still colloquially referred to as "microbrew") shortly before I started brewing. So by the time that I was really starting to experiment with recipes and deviate from kits, I'd developed a palate for hops. Furthermore, I was in a purely experimental mode and brewing without doing a ton of research and definitely without the aid of brewing software to help me calculate the effects of recipe changes or additions.

As I've researched more, started to use software and take measurements religiously, I've dialed in my understanding on a few parts of recipe formulation. This post is about hops and bitterness. All of the calculations herein are performed using the Rager formula. (Apparently this is less accurate for full-volume boils than Tinseth, but it's what I've been using and it's what the guys at the brewing network use. Since most homebrewers probably aren't using lab equipment to accurately measure IBU's, we're just looking for a consistent way to measure.)

The IBU scale ranges from 0-100. According to most sources, you really can't discern bitterness past 100, but you will pick up additional hop aromas from late boil additions or dry hops once you've hit 100 IBU.

There are five variables in the Rager formula which affect bitternes: wort volume, wort gravity, alpha acid %, hop mass and addition time. I held the wort volume and wort gravity constant and ran some numbers for both this post and my own curiosity. The results were interesting and pointed out a few things I hadn't fully realized before.


(The table I used to create the graph is here.)

The conclusion I'd already come to by using brewing software and digging in to styles is that it doesn't take much of a bittering addition to max out one's taste buds. A 1 oz charge of bittering hops is really all you need for an IPA or any other highly bitter beer. Much beyond that and you're just wasting hops.

One thing I didn't realize is that the utilization (according to Rager) for a 90 minute boil is almost exactly the same as a 60 minute boil. So don't bother extending your boil time for higher bitterness. (Use it for wort concentration on high gravity beers or DMS reduction, but those are two separate posts.)

The other thing which I dug into is the affect of a flame-out addition. Based on some other sources, the extraction of bitterness from hop additions happens at temperatures above 158F. As such, your flame-out or late additions may end up contributing more bitterness than aroma if you're not cooling your beer quickly. (I noticed a substantial difference in the level of hop aroma I got this summer when I incorporated a proper wort chiller into my process.)

Monday, November 28, 2011

Brewing and Engineering

My post from yesterday referenced the strong correlation I've noticed over time, but here are some more concrete examples of a very strong correlation between brewing and engineering. (I picked up Brewing Better Beer last week and started reading it in earnest today. Turns out Gordon Strong is a software engineer by training as well.)

Jamil Zainisheff (Software Engineering) : Author, Ninkasi Award Winner, Brewery Owner, Radio Host
John Palmer (Metallurgical Engineering) : Author, Radio Host
Gordon Strong (Software Engineering) : Author, 3x Ninkasi Award Winner, BJCP Grand Master Judge, BJCP President
Matt Brynildson (Chemistry) : The most award-winning brewmaster in America

I'm a software engineer by training, as is Jeremy and the other guy I brew with on a semi-regular basis. Anyone else out there happen to notice this or have other good examples from the commercial world?

*As an engineer I'm clearly obligated to acknowledge that this is far too small of a sample to be statistically significant. However, these are all guys who are at the absolute top of their game and all happen to have a math / science background.


Sunday, November 27, 2011

DIY'ing Brewing

I think that there's a pretty strong correlation between being an engineer and enjoying homebrewing. Part of the fun (at least in my book) is getting to build your own gear. Some of the nicer commercially produced stuff out there is pretty expensive but not all of it is as nicely made as the Blichmann stuff... So since I'm kind of cheap, have a pretty substantial collection of tools, and love making stuff, I've built or modified a decent amount of stuff at this point which I use on a regular basis. There's something particularly satisfying about not only making beer but making beer with a brewery you've assembled partially by hand.

To date (in rough chronological order) I've DIY'd the following:

  • Wort Chiller (Bad design, ultimately replaced with a commercially made immersion chiller which I have plans to Jamil-ify this winter)
  • Kegerator (With disconnects for Corney and Sankey kegs)
  • 10 Gallon Rubbermaid cooler mash tun
  • 5 Gallon Rubbermaid cooler HLT / sparge tank
  • Hose-friendly water filter
  • A Keggle
Over the next couple of weeks I'll post more in-depth articles on some of the above. 

Wednesday, November 23, 2011

The Evolution of a Beer Lover's Palate

Over the summer, we opened a new restaurant at my day job. After years of pushing for a better beer list, I finally met with a measure of success at this location. We held a couple of staff tastings with a certified cicerone to educate our servers and bartenders on what they were selling to our customers.

One of the things which jumped out at me was that the beers I liked the most got the most confused reactions from our staff. However, the cicerone had a nice nugget of wisdom: an appreciation for bitterness is the last thing to develop for most beer drinkers. I think that this is true, with one addition. Appreciation for bitterness is second to last, with an appreciation for sour beers being the last.

I personally started with the heavily fruited (Lindeman's being the most widely available here in Chicago) lambics, but tried a true gueze at some point a few years ago and appreciated how different it was. I've slowly been drinking more and more sour beers as of late and really growing to appreciate the complexity of something you have to slow down and sip. The old-world Belgian examples have a lot to offer, but there are some american breweries doing excellent work in this Genre. (Jolly Pumpkin is a Michigan-based small brewery who does exclusively sour, barrel-aged beers and happens to probably be my favorite thus far.)

There's even five gallons of sour cherry brett-fermenting lambic slowly aging away in a dark corner of my basement right now...

I was inspired to post this after reading this article.

Tuesday, November 22, 2011

Back to the Basics : The Extract Experiments (pt 1.)

So, after a summer of intense brewing I'm going to test a hypothesis this winter. Since I'm in Chicago and it gets way too damn cold and snowy to brew outside, I'm going back to extract with steeped grains. This might seem a bit odd, even given the environmental constraints of the midwest, but there's a purpose. Jamil often talks on The Brewing Network about how important good fermentation is to the end result of a beer. I want to put this to the test and see if we can brew some amazing extract beers this winter using a stovetop, a ten gallon megapot, a wort chiller (which I need to add a garden hose fitting somewhere indoors for), and proper fermentation technique.

The hot side process will be dramatically less complex than what we've been doing all summer, but the fermentation side will stay exactly where it's at now. (Yeast starters with proper pitching rates, oxygenation, temperature control, finished up with cold-crashing and 1-2 weeks of lagering depending on the beer.)

We're starting off with an Imperial IPA and a Mexican Hot-Chocolate infused stout. (Foreign Extra.) Results on these beers and a few more will follow soon...

Monday, November 14, 2011

Citra IPA (Zombie Dust Inspired) Wrap Up and Tasting Notes

This beer was in the fermentor for twelve days (five or six very visibly active days, after which I raised the temp on my controller by four degrees to help the yeast do their cleanup work), cold crashed and on the yeast for another week, and then transferred to a keg and lagered for another week.

After a lot of reading this summer and fall (particularly Jamil Zainisheff and Chris White's Yeast book), I've switched to a process that relies more on temperature than on racking to achieve clarity in my beers. It seems to be working pretty well...

So on to the fun part - drinking the beer! 

Appearance: Straw colored, leaning ever so slightly towards copperish. (Thank you melanoidin malt.) Bright white head which sticks around and leaves a defined lacing down the side of the glass.

Aroma: I love Citra. Seriously. The nose on this one is resiny, overlaid with the tropical fruit you pretty much only get from Citra. Negligible malt on the nose.

Taste: Starts out with the same pine and resin and note you get on the nose, after which you move to the residual malt sweetness and some slight bread / toast notes and then finishes out with that tropical fruit funky bitterness. The first couple pours had some distinct sulfury yeast flavor from the Wyeast 1056 which I've picked up on other batches, but that's disappeared either on account of cold and time or just being pulled out in the early pours.

Mouthfeel: Light body and lively carbonation. 

Drinkability: Win. For a beer that came in at 7.5%, there is almost no aggressive alcohol character or other hints that it's a big beer. The low finishing gravity and the dry finish make this a dangerously session-able beer.

I'll post pictures shortly and do a side by side of the Wyeast and White Labs batches soon!

Tuesday, November 8, 2011

Epic Blow-off

Last weekend I brewed two five gallon batches of Russian Imperial Stout with Jeremy. Both recipes were monster beers (more on that in a future post) with target original gravities over 1.100. The brew day was largely uneventful - no boil overs, no stuck mashes / sparges.

We wrapped up brewing around 5pm, filled up the second better bottle with roughly 5.5 gallons of the bigger of the two beers, oxygenated for 45 seconds off of a disposable tank, and pitched a starter of WLP004 (Irish Ale.)

I mistakenly put the temperature control probe on the other beer, which was slightly lower in starting gravity and pitched with WLP001 (Cal Ale.) The typical blow-off rig I've been using at this point is a drilled universal bung with 5' of 1/2" OD tubing into a growler half-filled with Star San.

It probably should've been cause for alarm when I checked on the batch three or four hours later and the big batch was already showing signs of active fermentation. Alas, I was just excited to see it bubbling away.

This is what I found the next morning when I went to check on it... I don't have the fancy vinyl sticky numbers on the side of the better bottles, but I'm guessing we lost about a gallon of beer out through the blowoff hose. That black pool of liquid the carboys are sitting in is potentially delicious monster stout I had to drain out onto my basement floor. The temperature on the smaller beer was stable at the controlled 68F, but the big one had risen to 72F.

Needless to say, after spending a half an hour cleaning this mess up, I moved the growlers out into buckets outside of the freezer and proceeded to witness still more blow-off.

I've never used the foam control products in a fermentation, but does anyone out there have any suggestions for how to avoid this scenario? My thoughts were to use a bigger diameter blow-off hose, add fermcap, or leave a lot more headspace on a big beer like this one...


Monday, November 7, 2011

WLP001 v Wyeast 1056 Results

The citra IPA Jeremy and I recently brewed was the first batch I've actually oxygenated vs simply aerated. After reading Yeast by Jamil Zainasheff and Chris White, I decided to invest the few bucks in a mostly proper oxygenation setup in order to get my fermentation that much more optimal. We brewed for a ten gallon yield, split the batch in half and pitched starters of WLP001 and Wyeast 1056 into two separate fermentors. Each 5 gallon better bottle got a 30 second shot of pure oxygen through a 5 micron stone. Both 2 liter starters were treated identically with yeast nutrient and splitting time on the stir plate.

Fermentation took off pretty quickly for both (an expected outcome) but over the course of fermentation, I experienced a level of attention from WLP001 which was a completely unexpected outcome.

OG on this beer was 1.065 and the target finishing gravity should have been around 1.016. On this batch the WLP001 made it all of the way down to 1.008. This puts the attenuation rate at 85% instead of the typical 75%. The Wyeast ended up right around 1.016. Jeremy got the WLP batch, so I haven't had the opportunity to do a side by side of carbonated, conditioned beer, but my preliminary tasting indicated that the WLP version was more neutral and thinner than the Wyeast version. The latter had some of the faint sulfury character I've picked up on the last few batches we've fermented with Wyeast 1056.

Saturday, October 29, 2011

Yeast Starters Made Dead Simple


There's a ton of information already out there about making yeast starters and the benefits of doing so. After more than a handful of batches for which I've made starters, many boil-overs, scorched flasks, and stir bars that just won't stir, I'll share the seemingly insignificant tricks I've learned which make the process smooth. There are a few bits of "advanced" equipment which really help: a stir plate and stir bar(s) and an infra-red thermometer. Here's what I do:


  1. Clean your 2L Erlenmeyer heat-resistant flask with PBW to get any crud out of there
  2. Refer to Jamil's calculator for the proper pitching rate for your brew
  3. Take your yeast out of the fridge in order to let it get to room temperature.
  4. Put your dry, empty flask and a funnel on your scale and zero it out
  5. Measure out 1g of DME for each 10ml of water and dump it in the flask. (100g for 1L, 200g for 2L.)
  6. Add an appropriate dose of your preferred yeast nutrient
  7. Add your water
  8. Drop in a stir bar if you have a stir plate.
  9. I like to give the mixture a stir before putting it on the stove to help the DME really dissolve. (Of course if you like scorched, carbonized DME stuck to the bottom of a flask you can skip this step.) If you don't have a stir plate, just shake the crap out of it until everything is dissolved.
  10. Add three to four drops of Fermcap or some other foam control additive and cover the mixture in aluminum foil
  11. Put the flask right on your stove and set the burner at medium-low heat. I've found that bringing it to a boil slowly prevents the volcanic eruption of foam which has left my stove caked in sticky, carameley goo. (I use an infra red thermometer to watch the temperature. Yes, I am a nerd.)
  12. Do not walk away from your starter. It will know that you have and promptly boil over. Typically I turn the heat down to low right as it reaches a rolling boil.
  13. Set a timer for 15 minutes and let it boil.
  14. Kill the heat once time is up and transport your flask to an ice bath. If the water in the ice bath is lower than the level in your flask, it'll stay upright. If it's too much higher, it'll try to float and probably spill into your cold water. See step 3.
  15. Gently slosh your flask around to cool it down faster.
  16. Once you get to 75 F, add your yeast. Be sure to sanitize your foil cover before putting it back on. I like a spray bottle of Star San for this.
  17. Put your flask on your stir plate and then turn it on. Otherwise you'll just bounce the bar around. (If you don't have a stir plate, just swirl that baby every so often.)
  18. 24-30 hours later, you should have a healthy, bubbly starter. Don't forget to watch for that stir bar when you decant it into your beer...

Monday, October 17, 2011

Possibly the Single Best Piece of Brewing "Equipment" I Own

... is actually a piece of software. I personally use BeerAlchemy for the Mac although I know other tools are out there. I've briefly played with BeerTools and HopVille but I ended up ponying up for a license of BeerAlchemy for a couple of reasons. Firstly, it's done in the Mac school of design and is pretty damn intuitive. Secondly, it's easy to use along the learning curve of brewing. It doesn't make you use the more advanced options right away, so you can delve deeper into the program as you progress as a brewer.

There are a few reasons I think good software is one of the keys to actually moving from a beginning or intermediate brewer to an intermediate / advanced one.

  1. Consistency: Some of my early extract batches turned out great, some were so-so, and a couple were bottle bombs. If you asked me what went right or wrong, I simply couldn't have told you. With software (or even a paper-based brew log) I can track my ingredients, my process and any miscellaneous notes along the way. So if I like a batch and want to brew it a second or third time, I can pin down which variables changed and ultimately get to the point where it's possible to make the same exact beer twice.
  2. Process: Taking and recording readings through the brew process alongside of the process you used for a particular batch dramatically helps you understand whether what you're doing is working properly. If you've ever brewed a batch which turned out way too thick or thin for the style you were shooting for or ended up with a beer which was so sweet your friends couldn't choke it down, chances are something is off in your process. Once you start taking gravity readings at various key steps, you can discern where the problem lies.
  3. Recipe Design: One of the best parts of actually using software is keying in a recipe and watching the resulting gravity numbers, color and IBU's change based on your ingredients. I think that simply going through this process repeatedly can make an enormous difference in one's understanding of the roles ingredients actually play in a beer.
(All that said, it's also possible that it's entirely possible to brew great beer without software and this just gets the nerdy engineer in me going...)

Sunday, October 16, 2011

Citra IPA (Zombie Dust Inspired)

I love IPA's. They've been the beer I've stuck with in my journey to a deeper appreciation of all things beer. I've tried as many as I can get my hands on, made a pilgrimage to Delaware to try 60 minute at the source, and brewed many iterations of what never seems to be quite a perfect recipe.

Yesterday my brewing buddy (who I'll simply refer to as JP from here forward) did a ten gallon batch of an IPA with all Citra hops for the flavor and aroma additions. We're lucky enough to get Three Floyds Zombie Dust distributed here in Chicago, and they happen to carry it on tap at Merkle's (one of my favorite bars) whenever they can get their hands on it. It's a new release for Three Floyds, but it is pretty damn close to perfect. It's light copper in color, slightly hazy, and just reeks of that citrusy, resiny hop character that defines an American IPA. It drinks way too easily for something that comes in at 7%.

So, in the pursuit of finding a recipe I can keep coming back to and I based this recipe on Jamil's American IPA in brewing classic styles but substituted Citra for all of the late hop additions.

Citra IPA (10 Gallons)


US 2-Row Malt   25.50lb   (85.0%)
US Caramel 20L  2.00 lb   (6.7%)
Munich                 1.50 lb   (5.0%)
Melanoidin Malt   1.00 lb   (3.3%)


Warrior (17%)  43g @ 60m
Citra (11%) 46g @ 10m
Citra (11%) 62g @ 5m
Citra (11%) 46g @ 0m

We're fermenting at 64F and using White Labs' and Wyeast's California Ales in the two 5 gallon fermenters.


No results yet, but the wort was both sweet and bitter with a pretty hop-forward nose. Hopefully the aroma contribution from the Citra and the slight red tint we should get off of the Melanoidin malt get this beer closer to that IPA I've been lusting after...
After an extended break largely due to many, many things in my life changing, I'm going to try to pick this blog back up. I've progressed substantially as a brewer, moving from extract batches up to a very DIY ten gallon all-grain system. I've read and listened to a ton of material which has contributed to me becoming a better brewer, but more importantly I have brewed with far greater frequency.

I'll get caught up by sharing some of the things I've learned and by detailing out my process in the hopes that it helps others to really dive in to the hobby in the same way I have.